Email

Instagram

Facebook

Pages

Showing posts with label copic markers. Show all posts

Tuesday, September 19, 2017

Honey Bee Stamps Fall Release: Day 3


Hi there crafty friends!

I'm so excited to be part of the Honey Bee Stamps Fall Release! Today is Day 3 and I get the pleasure of creating with the Gather Together and Forest Friends Stamp Sets. I created the background with lots of Copic Markers in Autumn shades. This background was actually easy to make. This card was my first time trying this technique and I have shared the whole process in the video below. The sweet critters were also colored with Copic Markers. I am in love with this adorable gathering of forest animals! 


Below I have attached a process video with the steps to making a fall tree with Copic Markers. I also have a YouTube channel if you'd rather watch there. Please click HERE to visit my YouTube channel.

Video:


All of the new Honey Bee Stamps products will be available for purchase Thursday at Midnight! All of the other supplies used in my video can be found in a supply list at the end of this post. 


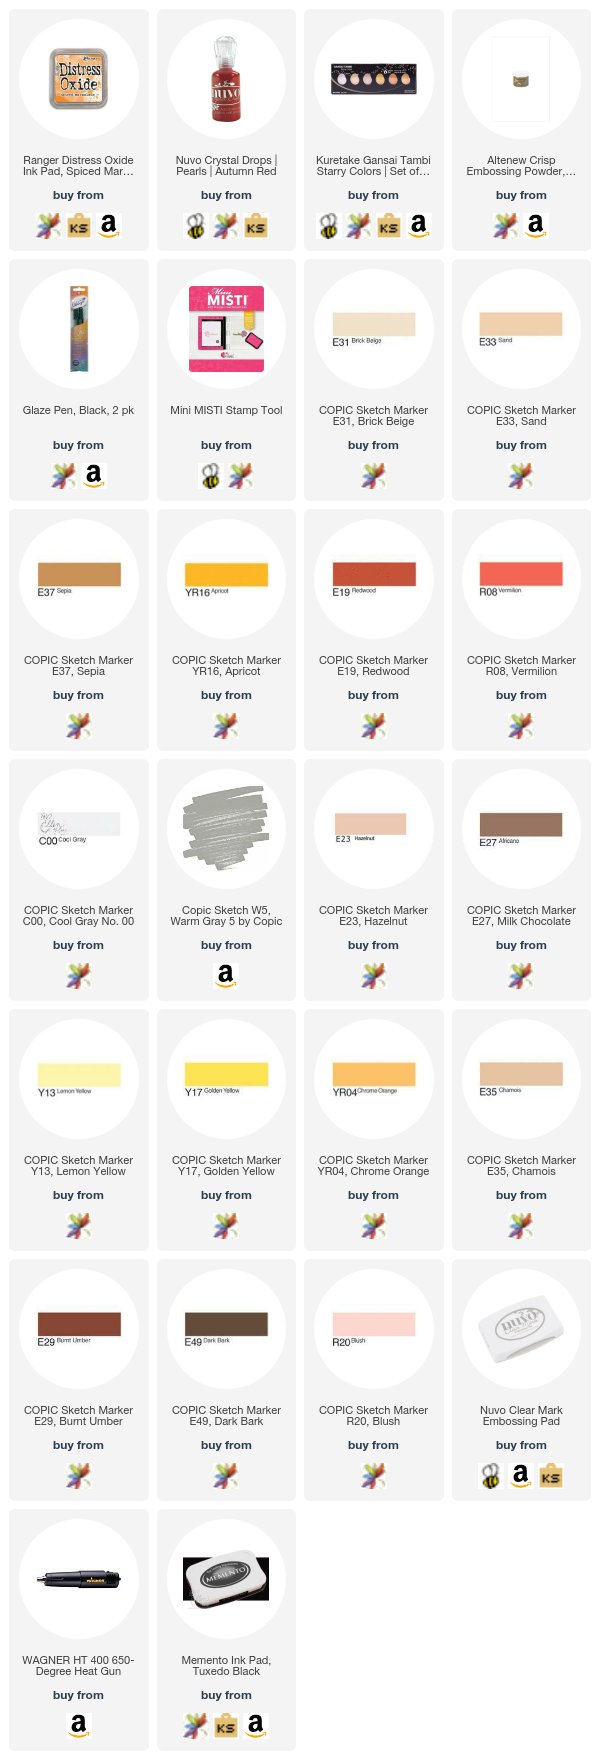
The inside of the card was stamped with the Forest Friends Stamps set. I heat embossed one of the sentiments from the Gather Together set in Antique Gold Ink. 


I added a little bit of shimmer to the leaves with the Gansai Tambi Starry Colors Watercolor Set. I love the subtle sparkle it adds to the beautiful fall leaves! 


All of the Honey Bee Stamps crew will be taking part in a Fall Release Blog Hop on Friday! Please stop back by to see more from this fantastic release! 

Supplies:
Monday, June 19, 2017

Kat Scrappiness Blog Hop!!!


Thank you so much for visiting my blog on todays 1st Celebration Blog hop for KatScrappiness.com. Today is so exciting! Not only will you be inspired by the designers projects along this hop, there is a lot of fantastic prizes to be won! You should have arrived here from Katty's Blog, but if I am your first stop you will find the full link up list at the end of this post or on Katscrappinessblog.com.
We are so excited to announce the addition of our first ever exclusive clear stamp sets! One that is perfect for interactive papercraft designs and one that is an adorable Giraffe! You will also catch a glimpse of some brand new dies and sequin embellishment mixes that are also exclusives. Check out all of the exclusive products at KatScrapiness.com


Hi there, friends!! 
My daughter Emily and I are both participating in this exciting hop! 

First, I used both of the new Kat Scrappiness stamp sets to create this card. I stamped little Lola the Giraffe in Memento Tuxedo Black Ink. This ink is Copic Marker safe! After stamping Lola, I colored her with my Copics and then fussy cut her so I could pop her onto an action wobble. 


I thought this card would be the perfect opportunity to use Kat's new Sign Post Die Set. I stamped the "Let's Hang Out", also from the Lola Giraffe Stamp Set onto one of the sign boards. Then, using the Interactive Instructions Stamp Set, I stamped "interactive card" and "i move!" with the arrow. This Sign Post Dies Set also includes the grass, so I cut several patches of grass to add around the sign and Lola. I added tufts of grass here and there with Green Copic Markers. The Green and Blue of the background are done with Distress Oxide Inks! The clouds are dies from Avery Elle, called Pierced Cloud Dies. The clouds are also shaded with the Distress Inks. I added stitching around the edges with the Kat Scrappiness Stitched Rectangle Dies. 


Next up is my daughter Emily's card! 


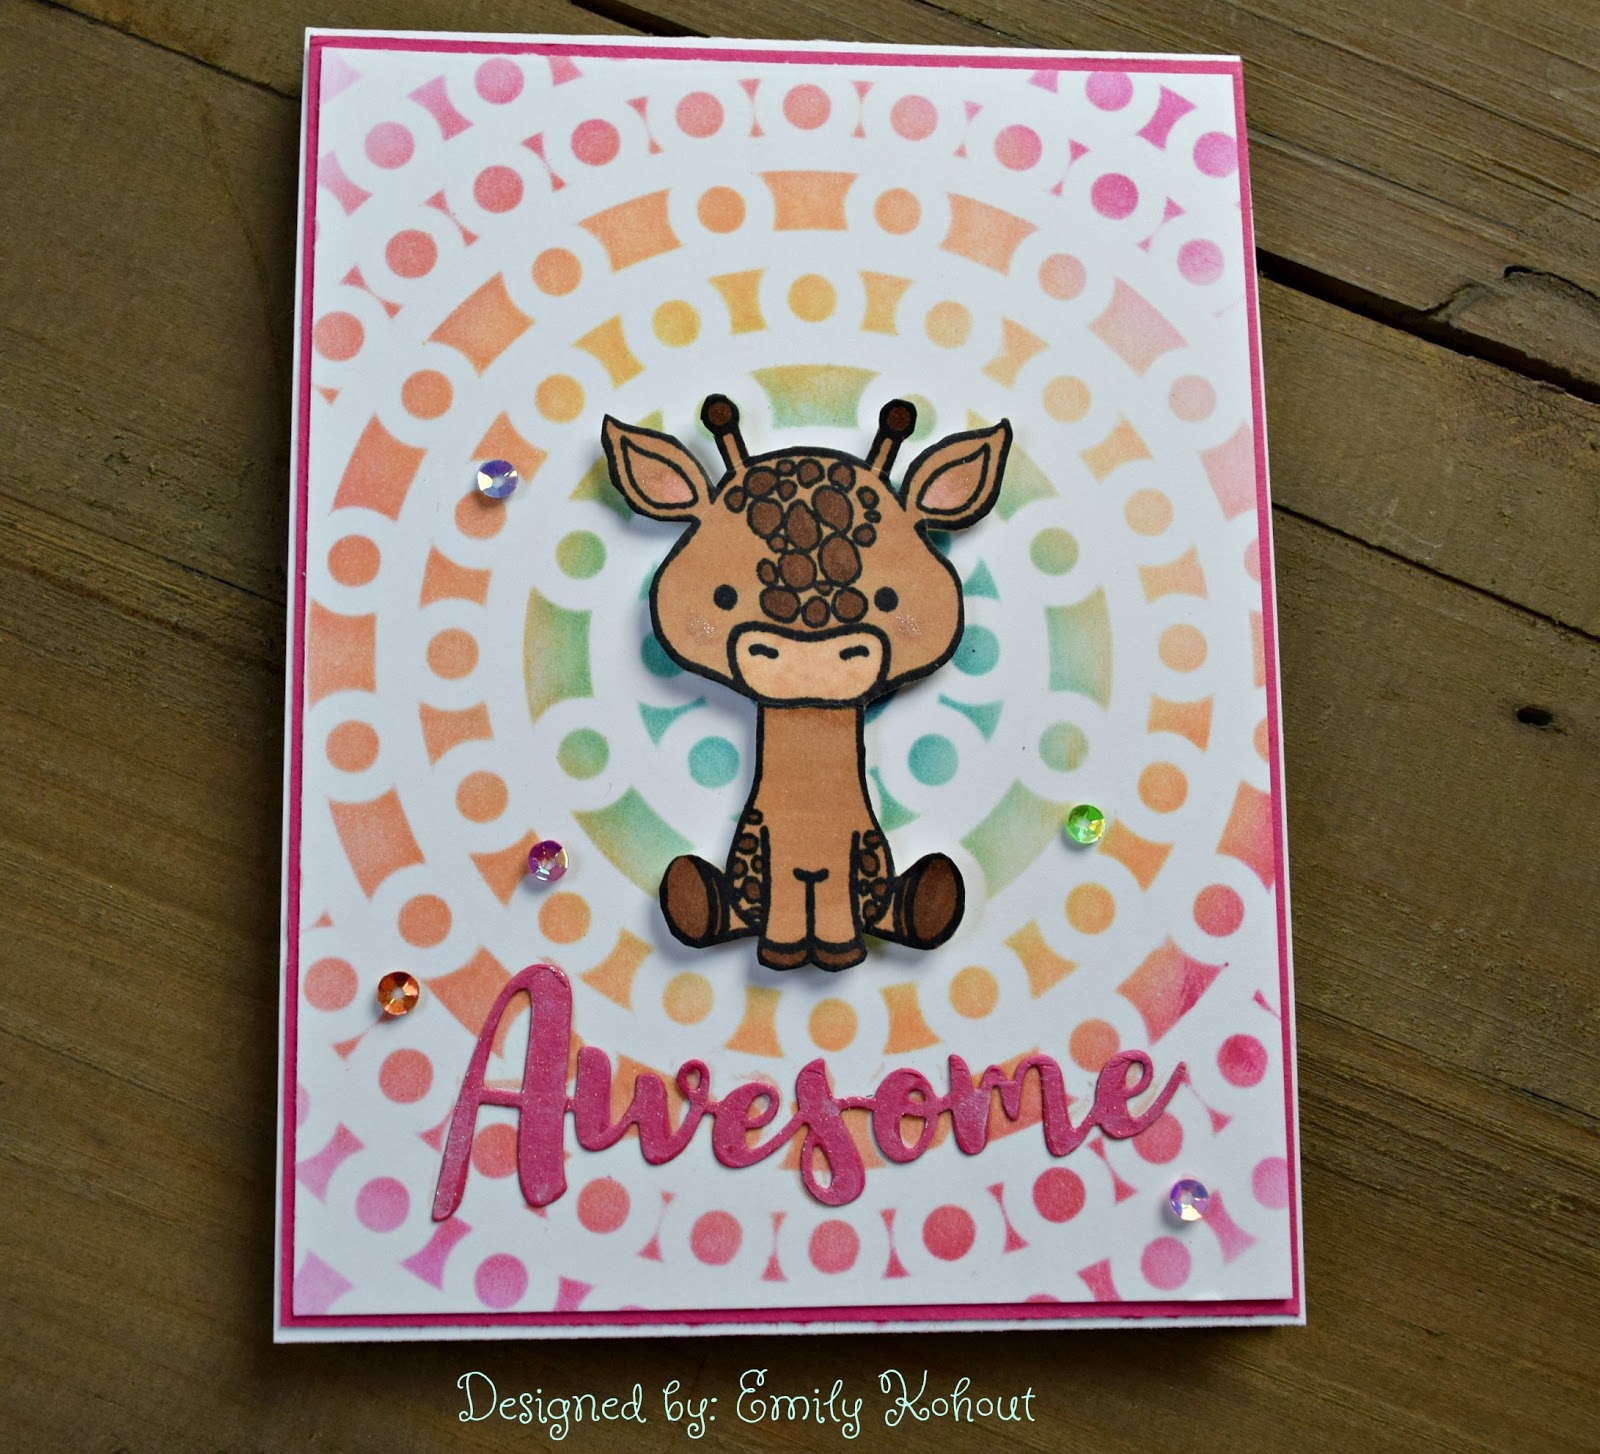
Emily used several different colors of regular Distress Inks to create her bright background! She used a stencil that was cut with a Silhouette cut file. Lola the Giraffe was stamped in Memento Tuxedo Black Ink and then colored with Copic Markers. Emily fussy cut Lola and popped her onto the card background with a little bit of foam tape. The "Awesome" sentiment is one of Kat's! Emily die cut it in coordinating card stock and adhered it to the ink blended background. Last but not least she added a few Kat Scrappiness Mini Mix Up Sequin Mix!


I hope you have been inspired by our cards! In order for your chance to win one of the brand new stamp sets or one of the three grand prizes you must comment on all the designers blogs and the Kat Scrappiness blog. That is over 10 chances to win! Winners will announced at 12 noon pst on 6/25/17, you have until 12:00 midnight pst Saturday 6/24/17 to enter!
The full blog hop line up is:
Kelley You Are Here ;)

I'm the last stop on the blog hop. If you missed any designers along the way, or for information bout the 10 giveaways head over to the Kat Scrappiness Blog ****HERE!!!!****


Supplies:
Tuesday, May 16, 2017

Be Unique! Featuring: Honey Bee Stamps


Hello again friends! I hope you all are having a blessed week!

I have to tell ya.... this card was so fun to make! I have seen layered backgrounds like this in the past. Some stamped underneath. Some color blended. There are tons of techniques you could use to make a background like this. I chose to use the sweet little daisy blooms from the Busy Bees Stamp Set. First, I die cut the upper layer with the coordinating Busy Bees Honey Cuts Dies. I put a piece of Neenah Solar White Card Stock into my Mini Misti and then laid the die cut layer on top of it. I fit the daisy stamps into the open die cuts like little puzzle pieces to insure I stamped them where they belong. Closing the lid of the Misti I picked up the stamps.  I removed the die cut layer, inked the daisy blooms up with Memento Tuxedo Black Ink and then closed the Misti lid to stamp. I followed this process over and over until all of the die cut flowers had stamped images underneath them.


I found inspiration images on Pinterest for coloring both the white daisies as well as the bright and colorful one. Using Copic Markers, I very simply colored all of the images. The "Be" die cut was made using the scripty "Bee" word in the Bee-You-Tiful Honey Cuts Dies Set. I simply trimmed off the extra "e" to form the word I needed. The word "unique" comes from the Bee-You-Tiful Sentiment Stamp Set. It was stamped in Versamark sticky ink, covered in black embossing powder, and finally heat set. I added a little glitter to the colorful flower and the die cut "Be" using a Wink of Stella clear glitter pen.

Below I have included a video of the whole process of making this fun card! Thanks for checking it out. While your there BEE sure to subscribe!

Video:


Supplies:
Tuesday, April 18, 2017

You Make Me Happy! Featuring: Honey Bee Stamps "Honey Buddies Stamps and Dies"


Hello there friends!
In my area of the world ( Washington State) we are getting lots of April showers. I'm hoping, with as wet as it's been, that it's going to be a green and beautiful summer. Our spring weather was the inspiration for today's card.


When looking through all of my Honey Bee stamps, I came across the Spring Honey Buddies stamp set. If you're like me, I often overlook the accessories and "extra" stamps in a set, because I get drawn in by the "main" image. I knew these little extras would be perfect for a card. I paired the umbrella and clouds up with the perfect greeting from the Happiness stamp set.

I started out by using the clouds from the Spring Honey Buddies Dies to dry emboss a background. I arranged the clouds over and over again and ran them through my die machine using embossing mats. I flicked on some Cool Grey Copic markers to give the bottoms of the clouds their stormy grey appearance.


I cut the cute umbrella twice. Once with white card stock, and again with the polka dotted patterned paper.  I did some super simple Copic coloring on the handle of the umbrella as well as the canopy. I clipped the handle off of the patterned umbrella and added it's canopy onto the the white umbrella piece using foam tape. The last things I did was add the die cut and embossed sentiment and the Clear Dew Drops.

I've added a quick process video below and I hope you check it out! While your visiting our YouTube Channel make sure you SUBSCRIBE!

Video:


Supplies:

Sunday, April 16, 2017

That Really Sucks! Featuring Virginia Turtle Stamps


Hello crafty friends!
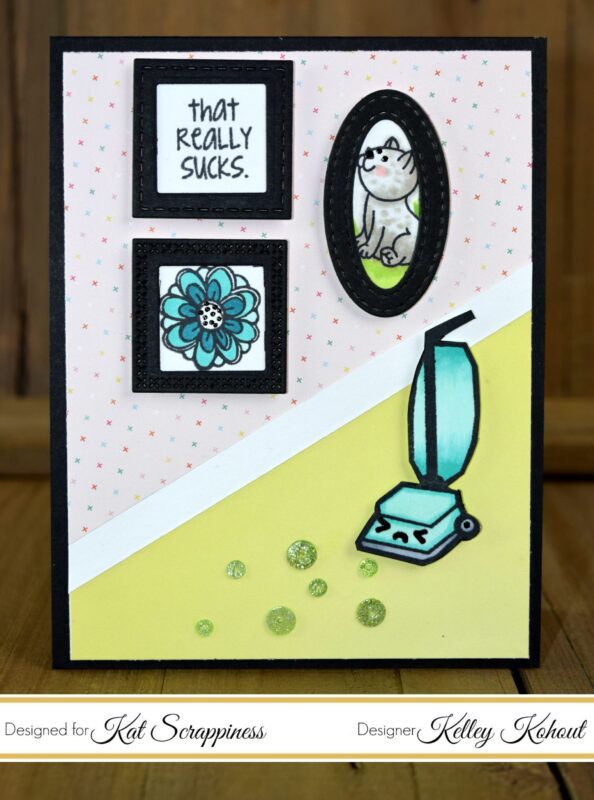
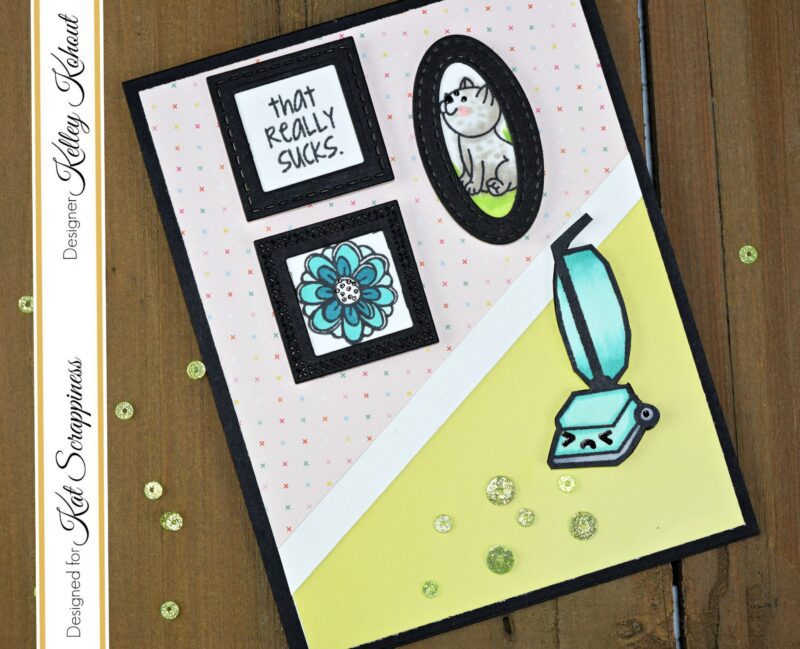
I knew when I saw this sweet little vacuum cleaner I had to come up with a cute scene. The background was very easy to arrange. Using the Fancy Pants "Joy Parade" 6x6 inch paper pad, I created a wall area with the pink patterned paper and the floor with the solid lime paper. I adhered both of these first, and then add a thin strip of white card stock to act as my baseboard.


The frames and mats for the pictures on the wall were made using several die sets. The square ones are Gina Marie Cross Stitched Square Dies, and Gina Marie Stitched Square Dies. I used the Kat Scrappiness Double Stitched Oval Dies for the kitty picture. After cutting all of the frames and mats, I stamped the images onto the white mat card stock. The Color My World floral image and the Curious Kitties stamp set are both from Honey Bee Stamps. The greeting and vacuum are from the same Virginia Turtle stamp set. I did some very simple copic coloring and added them to the card with foam tape. Lastly, the vacuum is sucking up some "Sparkling Lime" sequins from Kat Scrappiness.

I've included a quick process video below! Make sure you check it out PLUS...did you know that Kat Scrappiness has Daily Deals now? See the KS Daily Deals HERE each day!!

Video:


Supplies:


Sunday, April 9, 2017

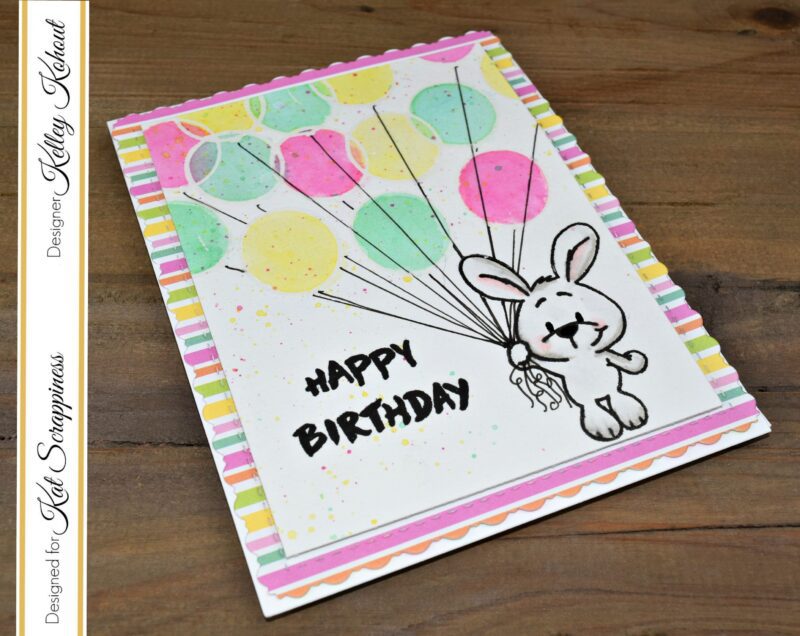
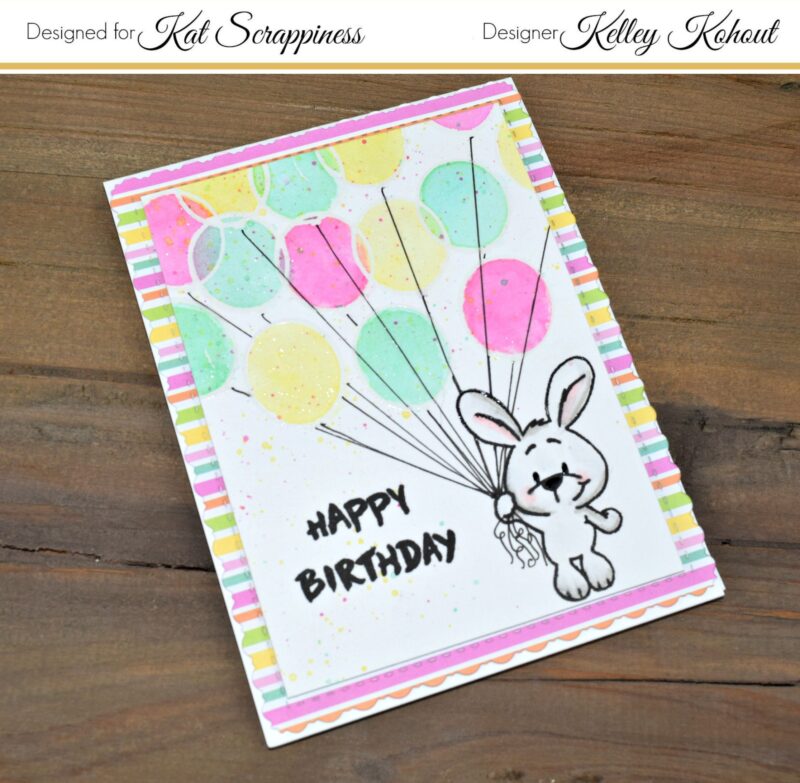
Happy Birthday! Featuring: Gerda Steiner's Happy Hoppy Stamp Set


Welcome everyone!

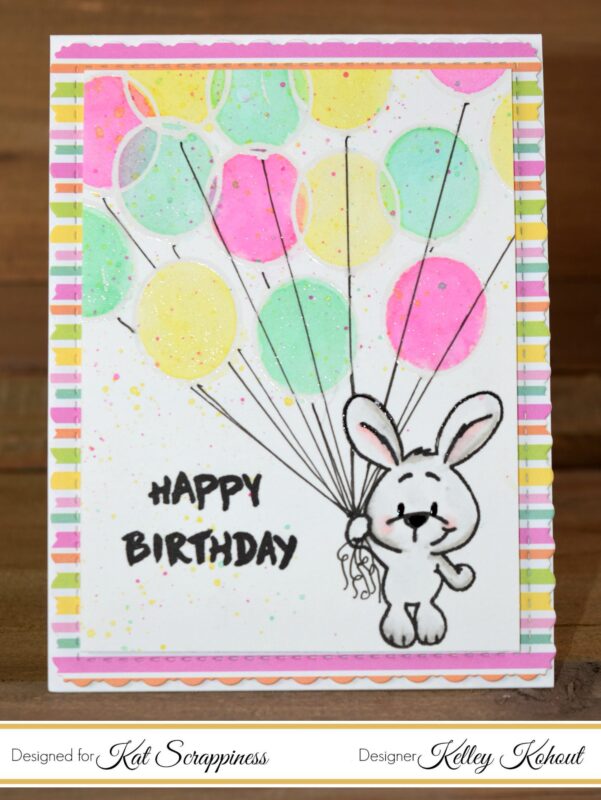
I just love this sweet little bunny from the Gerda Steiner Happy Hoppy Stamp Set. I stamped him in the lower right corner, so I could add lots and lots of balloons carrying him away. The balloons were stamped in Versamark sticky ink and then covered with clear embossing powder. After heat setting the embossing powder I began doing some simple water coloring using Distress Inks.


The heat embossed edges of the balloons acted as little barriers for the water and pigment. Before putting away the Distress Inks, I added tiny flicks of color all over the background.
The little bunny was colored with Copic Markers. I used very light grey colors only in the areas shadowed. Using R20, I added rosey cheeks and ears, and then smoothed out all of the color with the Colorless Blender.


The striped patterned paper is from the Doodlebug Design Easter Express 6x6 paper pad. I die cut it using the Kat Scrappiness Stitched Fancy Scallop Rectangle Dies. I love the interest and design it adds to the edges of the card. A little shimmer was added to the balloons and the bunny's cheeks and ears using Wink of Stella Clear Brush Pen.

I've added a process video below! Please check it out to see all the details of putting this project together.


Video:


Supplies:

Thursday, February 16, 2017

Honey Bee Stamps Sneak Peek Day 4: CURIOUS KITTIES


Hello friends!

I'm so excited to be sharing my first post and project for Honey Bee Stamps ;) and today we are announcing CURIOUS KITTIES


My project is a little sneak peek look at this Curious Kitties stamp set. Any cat or animal lover will appreciate all the thought and creativity that went into creating such a wonderful and playful stamp set. Lets take a look at what I have created -


This set contains many Curious Kitties in different sizes and poses. Also included are lots and lots of accessories for your kitties. From food dishes to collars, it's jammed packed with everything you need to deck out your kitty cat!


I used lots of these smaller images to create a fun background which almost looks like it's patterned paper!

I can't wait for you all to see what our talented Lesley Oman has created in this special collaboration.

Please check out the video below with details on this project!

For more sneak peeks of CURIOUS KITTIES, head on over to Lesley Oman's blog Hungry Heffy Crafts where she too is sharing some projects using this stamp set! Here is a peek of one of her projects for today:|


And don't forget to check back tomorrow for the full reveal and details on how to purchase this awesome set!


Video:


Supplies:


Tuesday, February 14, 2017

Card Project Featuring Lawn Fawn and Masking!


Hello Everyone!!

Today's project was so fun to make! I have to admit...I haven't done a whole lot of masking. It always seemed so intimidating. So I just thought out my design, gathered lots of supplies, and jumped in!

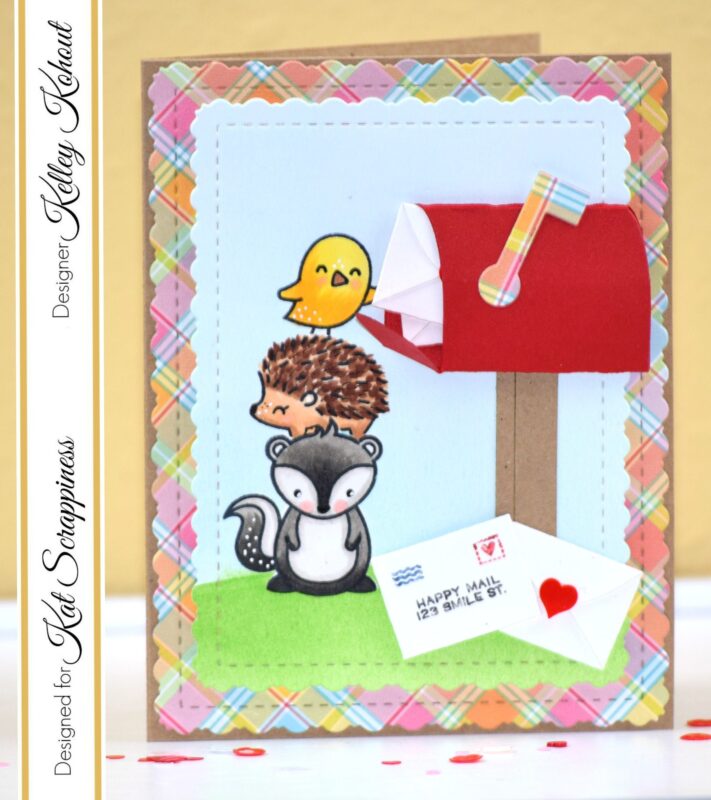
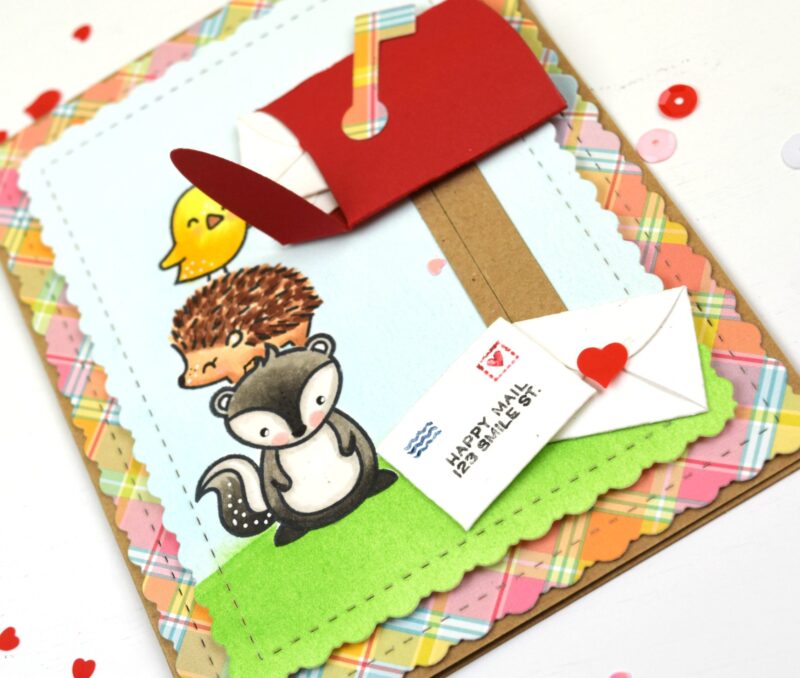
I used the Kat Scrappiness Stitched Fancy Scallop Rectangle Dies to cut the background pieces. The stamp sets used are all from Lawn Fawn. I used Love LettersHedgehugs, and Stinkin' Cute. The sweet little mailbox is also from Lawn Fawn and is called Happy Mail. The cute envelopes are included in the Happy Mail die set.


The images were all stamped with Memento Tuxedo Black Ink. I used my Clarity Stencil Brushes to brush on Tumbled Glass and Mowed Lawn Distress Inks. The cute little critters were all colored with Copic markers.

Skunk: W9, W7, W5, W3, W00
Hedgehog: E21, E23, E27, E29
Bird: Y11, Y13, Y17, E23

The adorable little envelopes were finished off with Kat Scrappiness Candy Kisses Sequin Mix.

Please check out the FULL process video below! I've included all the details, masking, and coloring!


Thanks, Kelley;)

Video:


Tuesday, January 10, 2017

Sending You Love!


Hello Everyone!
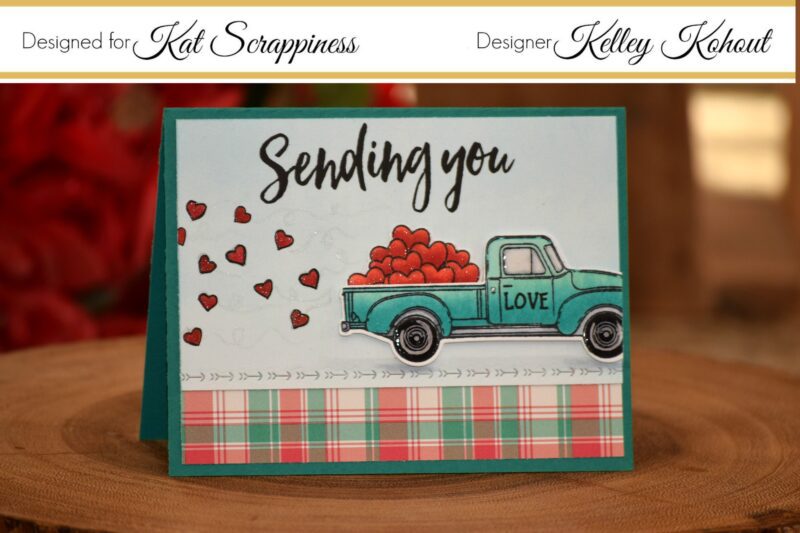
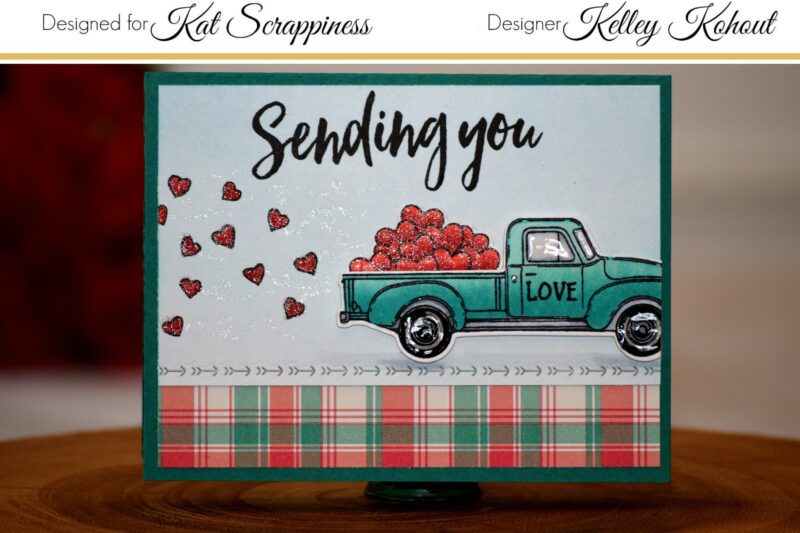
I'm super excited to be sharing my first Valentine project with you today. I started out by stamping the Little Pick-Up and Hearts from Honey Bee Stamps onto some smooth white card stock. Both images were stamped using my Stampaholic Stamping Tool and Momento Tuxedo Black Ink.


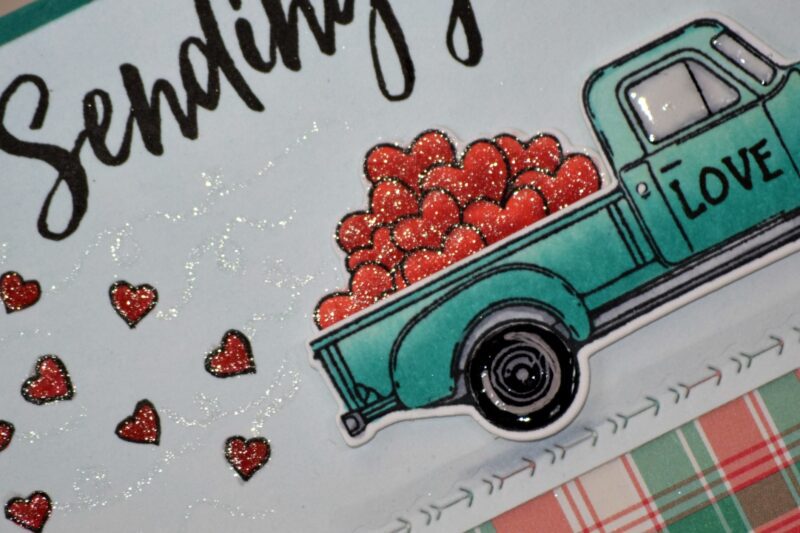
Both the load of hearts as well as the truck were colored with Copic Markers. I used the Little Pick-Up's coordinating dies to die cut both the truck and stack of hearts.

The hearts were colored with: R22, R27, R29

The Pick-UP: BG10, BG13

Tires, shadows and windows: C00, C3, C5


I added the trail of hearts ( heart stamp also found in this set ) , like they've flown out of the back of the truck by stamping them in Lawn Fawn's Chili Pepper Ink. I outlined them all with a fine black marker to give them the same look as the ones in the back of the pick-up. To finish them off I covered them in Clear Wink of Stella Glitter Pen and added glittery trails behind the hearts.  I added Glossy Accents to both the tires and windows to give them a little shine and dimension.


I prepped the background that the truck sits on by first using a Clarity Stencil Brush to lightly feather on some Tumbled Glass Distress Ink for a sky. Using the Sending You Sentiments from Honey Bee Stamps, I stamped the "Sending you" and "Love"  on the card using my Stampaholic Stamping Tool again and Versafine Black Onyx Ink. The "road" was cut using the new Lawn Fawn Valentine Borders Dies. This set come with 3 different borders: a scallop, hearts, and the arrows (pictured above). The plaid panel at the bottom was cut from Lawn Fawn's Perfectly Plaid Christmas 6x6 paper pad, and the whole card front added to a matching top folding card base.
For more information and all the details, please check out the video linked below!

Thank you again!
Kelley;)


Video:


Supplies: