Email

Instagram

Facebook

Pages

Showing posts with label stencils. Show all posts

Monday, June 19, 2017

Kat Scrappiness Blog Hop!!!


Thank you so much for visiting my blog on todays 1st Celebration Blog hop for KatScrappiness.com. Today is so exciting! Not only will you be inspired by the designers projects along this hop, there is a lot of fantastic prizes to be won! You should have arrived here from Katty's Blog, but if I am your first stop you will find the full link up list at the end of this post or on Katscrappinessblog.com.
We are so excited to announce the addition of our first ever exclusive clear stamp sets! One that is perfect for interactive papercraft designs and one that is an adorable Giraffe! You will also catch a glimpse of some brand new dies and sequin embellishment mixes that are also exclusives. Check out all of the exclusive products at KatScrapiness.com


Hi there, friends!! 
My daughter Emily and I are both participating in this exciting hop! 

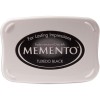
First, I used both of the new Kat Scrappiness stamp sets to create this card. I stamped little Lola the Giraffe in Memento Tuxedo Black Ink. This ink is Copic Marker safe! After stamping Lola, I colored her with my Copics and then fussy cut her so I could pop her onto an action wobble. 


I thought this card would be the perfect opportunity to use Kat's new Sign Post Die Set. I stamped the "Let's Hang Out", also from the Lola Giraffe Stamp Set onto one of the sign boards. Then, using the Interactive Instructions Stamp Set, I stamped "interactive card" and "i move!" with the arrow. This Sign Post Dies Set also includes the grass, so I cut several patches of grass to add around the sign and Lola. I added tufts of grass here and there with Green Copic Markers. The Green and Blue of the background are done with Distress Oxide Inks! The clouds are dies from Avery Elle, called Pierced Cloud Dies. The clouds are also shaded with the Distress Inks. I added stitching around the edges with the Kat Scrappiness Stitched Rectangle Dies. 


Next up is my daughter Emily's card! 


Emily used several different colors of regular Distress Inks to create her bright background! She used a stencil that was cut with a Silhouette cut file. Lola the Giraffe was stamped in Memento Tuxedo Black Ink and then colored with Copic Markers. Emily fussy cut Lola and popped her onto the card background with a little bit of foam tape. The "Awesome" sentiment is one of Kat's! Emily die cut it in coordinating card stock and adhered it to the ink blended background. Last but not least she added a few Kat Scrappiness Mini Mix Up Sequin Mix!


I hope you have been inspired by our cards! In order for your chance to win one of the brand new stamp sets or one of the three grand prizes you must comment on all the designers blogs and the Kat Scrappiness blog. That is over 10 chances to win! Winners will announced at 12 noon pst on 6/25/17, you have until 12:00 midnight pst Saturday 6/24/17 to enter!
The full blog hop line up is:
Kelley You Are Here ;)

I'm the last stop on the blog hop. If you missed any designers along the way, or for information bout the 10 giveaways head over to the Kat Scrappiness Blog ****HERE!!!!****


Supplies:

Tuesday, May 9, 2017

Honey Bee Stamps NEW Washi Tape!


Hello Honey Bee Friends!

Today I want to show you all of the beautiful Washi Tapes that Honey Bee Stamps just released! I'm sure most of you saw the quick sneak peek that Jennifer McGuire gave us last week. Here is a video introduction to all 4 gorgeous Washi Tapes!

Video Intro to the NEW Washi Tapes


My card project today contains 3 of the beautiful new washi tapes. I first stenciled the Hex Design (be looking for this stencil and others in the shop soon;)) using Clarity Stencil Brushes and Squeezed Lemonade Distress Ink. I just wanted a splash of color for texture and interest in the center of the background. Next, I layered the washi tape starting with the Zen Floral Exclusive Washi Tape. I added the Black with Gold Hexagon Foil Washi in the center to break up the black and white designs of the other two, as well as coordinate with the stenciled pattern in the background. Lastly, I added the Zen Bouquet Exclusive Washi Tape.

I love that the Zen Floral and Zen Bouquet Washis coordinate with the stamp sets of the same names. What a cool way to tie in the card to it's envelope, Bible journaling designs, and more! I used the coordinating stamp sets to create the matching bouquet of flowers for my card. The greeting was added using the Simple Sentiments Stamp Set. It's font was the perfect simple addition, so not to take away from the rest of the design.

Please check out the card process video below! While you're visiting BEE sure you subscribe!

Washi Thank You Card Video


Supplies:

Friday, December 30, 2016

Happy New Year!


Welcome everyone! I hope you all had a wonderful Christmas.
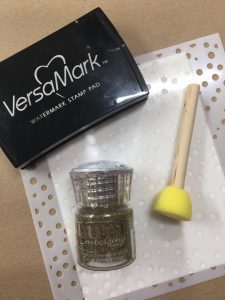
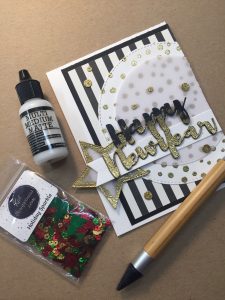
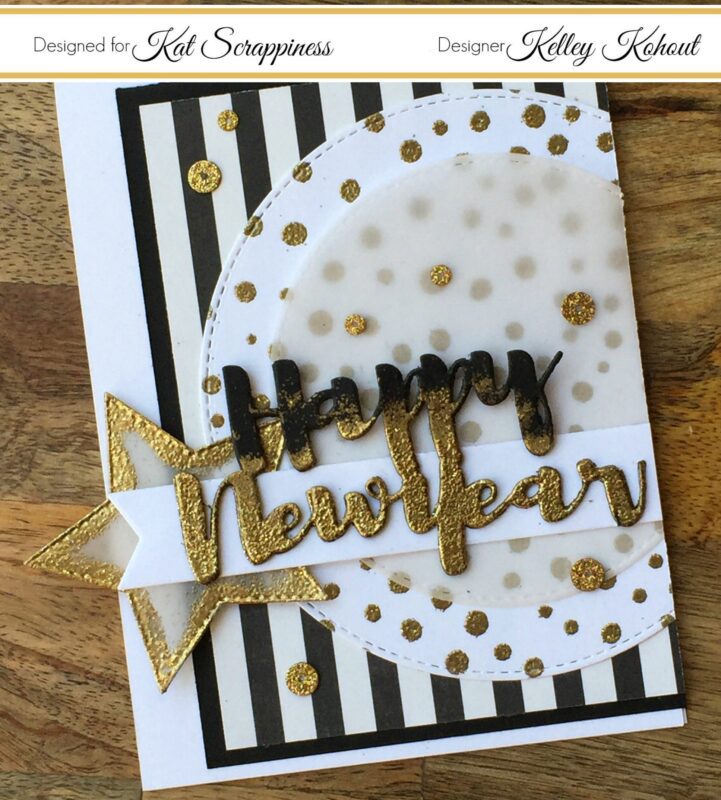
Today's project was created with the new year in mind. When I think of a New Year's Eve party, I think of lots of sparkle with black and gold. I started by stenciling the confetti dots onto smooth white card stock using Versamark sticky ink and the Echo Park Snow Fall Stencil. After taping the stencil down on top of the card stock, I squished my Versamark ink pad directly onto the stencil. I was careful to make sure to get plenty of sticky ink into the holes of the stencil.


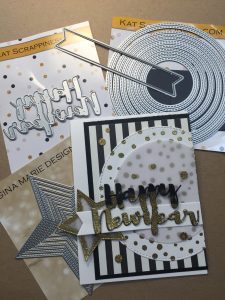
Using the Kat Scrappiness Happy New Year die, I cut the greeting three times.They were  adhered together with spray adhesive. I used an inexpensive sponge dauber to messily sponge Versamark stick ink onto the bottom half of the Happy New Year die cuts. Next, I covered the sticky ink with Nuvo Gold Enchantment Embossing Powder and heat set it. I wanted the Happy New Year words to look like they were dripping with sparkle.


Using the Kat Scrappiness Double Stitched Circle Dies, I cut the confetti background as well as a smaller vellum circle. I love how the vellum adds dimension and interest without covering up the gold dots underneath. I also cut a vellum star using Gina Marie Design's Stitched Star Dies. Using the sponge dauber again, I inked up the edges of the star and added more of the Nuvo Gold Enchantment Embossing Powder. This is all layered on top of black and white stripped patterned paper, and plain black card stock. I shifted all of the layers to the right and trimmed off the excess on that edge.


The finishing touch to my card was to add a bit more sparkle. Can you ever have enough sparkle? I used the Kat Scrappiness Holiday Sparkle sequin mix. These sequins have the look of being glittered. The gold was perfect for this design. They perfectly matched the gold embossing powder and carried the confetti look


Thank you for joining me today! I hope you all have a wonderful and blessed new year!
Kelley;)

Supplies:


Sunday, September 25, 2016

Sunday, September 18, 2016

Kat Scrappiness DT Project: Halloween Goodie Bags!


 I'm honored and excited to be posting today as part of the  Kat Scrappiness Design Team. When I saw the Cheery Lynn Designs: Happy Halloween Dies I was pumped. I knew that I was going to be able to cross Halloween goodie bags off of my Crafty To Do List. Every year I create some sort of goodie bag to give out to our neighborhood kids, as well as the children of friends. This project would even be easy to put together for school parties.


Here is a video on how I put everything together!