Email

Instagram

Facebook

Pages

Thursday, January 19, 2017

You Are My Most Favorite! - Featuring 2 Step Stencils and Clarity Brushes


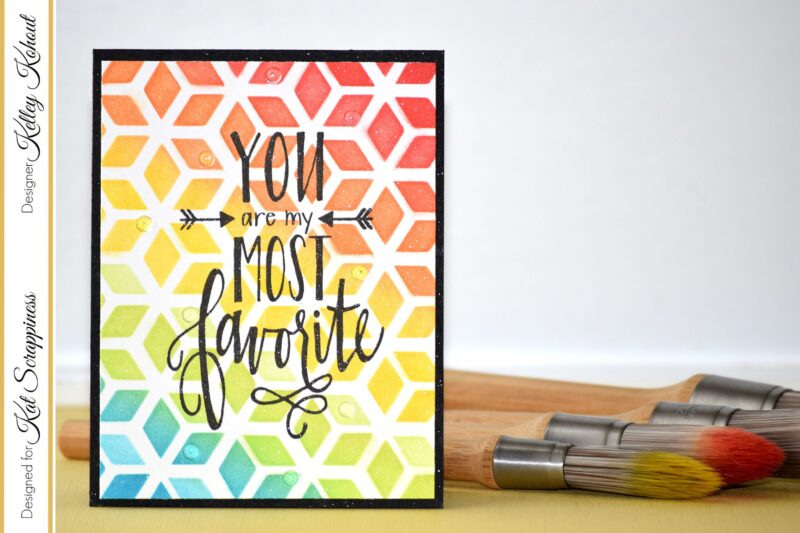
Hello everyone! I have a bright and fun project to share with you today. If you haven't tried the Die Cuts and More 2 step stencils, you should! They are fun, versatile, and beautiful! The stencils paired with the Clarity Stencil Brushes are a match made in heaven. AND...to top it off this design and card were done in under 30 minutes;)
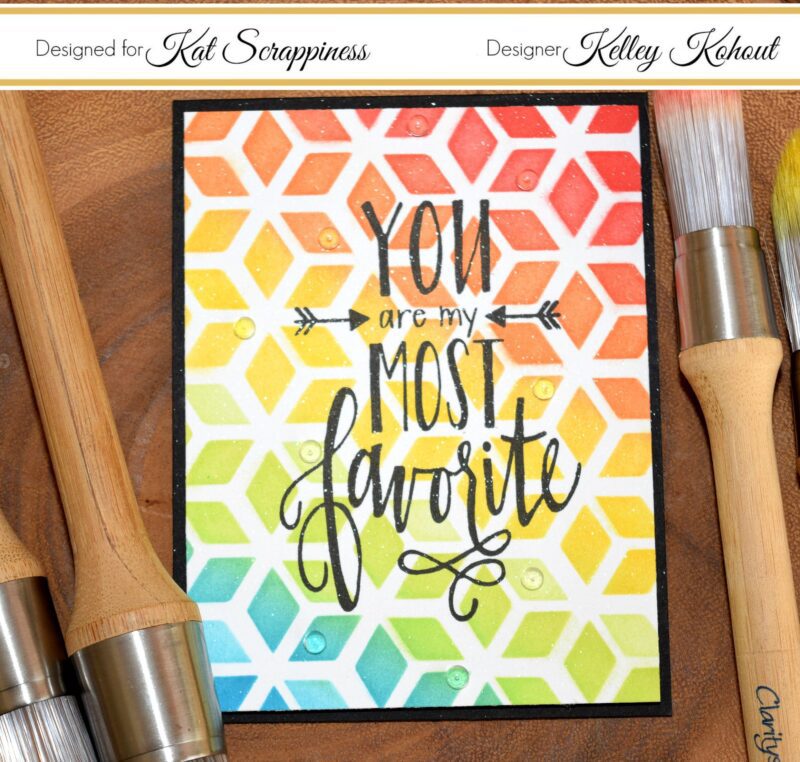


The 2 step stencils are very easy to use and have the most awesome designs. The one used on this card is called Cubicles. Please check out the video below for the detailed description and process on using both the Layering Stencils and the Clarity Stencil Brushes. I can show you so much easier than I can write out the process ;)
Have a great day!
Kelley;)

Video:


Supplies:


Tuesday, January 10, 2017

Sending You Love!


Hello Everyone!
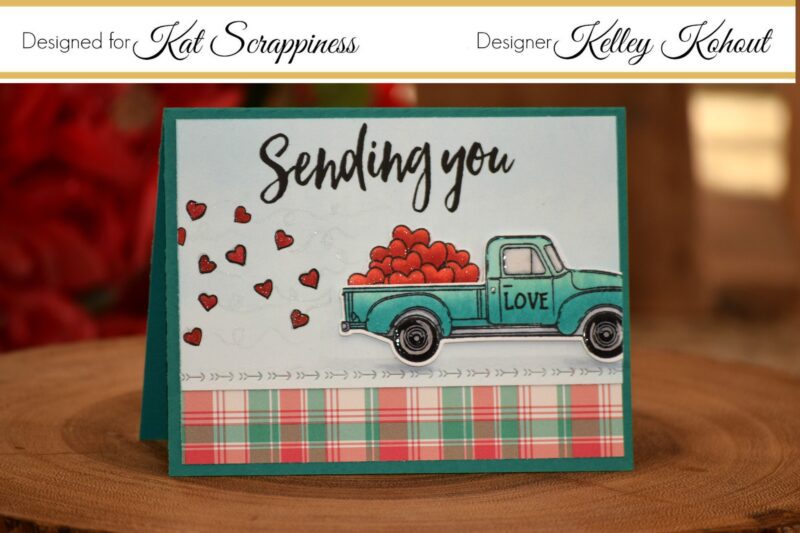
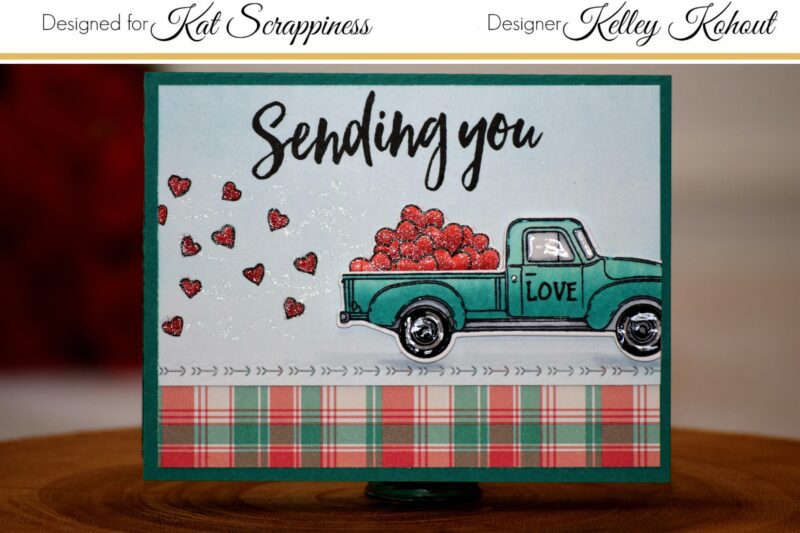
I'm super excited to be sharing my first Valentine project with you today. I started out by stamping the Little Pick-Up and Hearts from Honey Bee Stamps onto some smooth white card stock. Both images were stamped using my Stampaholic Stamping Tool and Momento Tuxedo Black Ink.


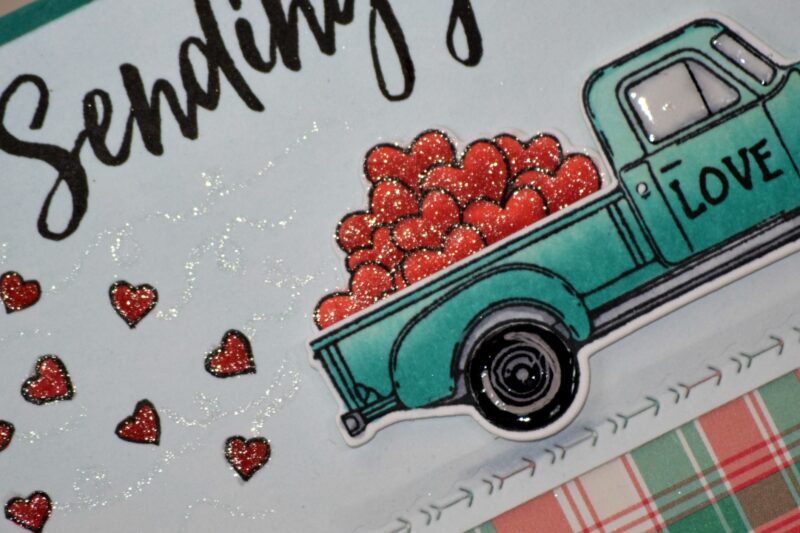
Both the load of hearts as well as the truck were colored with Copic Markers. I used the Little Pick-Up's coordinating dies to die cut both the truck and stack of hearts.

The hearts were colored with: R22, R27, R29

The Pick-UP: BG10, BG13

Tires, shadows and windows: C00, C3, C5


I added the trail of hearts ( heart stamp also found in this set ) , like they've flown out of the back of the truck by stamping them in Lawn Fawn's Chili Pepper Ink. I outlined them all with a fine black marker to give them the same look as the ones in the back of the pick-up. To finish them off I covered them in Clear Wink of Stella Glitter Pen and added glittery trails behind the hearts.  I added Glossy Accents to both the tires and windows to give them a little shine and dimension.


I prepped the background that the truck sits on by first using a Clarity Stencil Brush to lightly feather on some Tumbled Glass Distress Ink for a sky. Using the Sending You Sentiments from Honey Bee Stamps, I stamped the "Sending you" and "Love"  on the card using my Stampaholic Stamping Tool again and Versafine Black Onyx Ink. The "road" was cut using the new Lawn Fawn Valentine Borders Dies. This set come with 3 different borders: a scallop, hearts, and the arrows (pictured above). The plaid panel at the bottom was cut from Lawn Fawn's Perfectly Plaid Christmas 6x6 paper pad, and the whole card front added to a matching top folding card base.

For more information and all the details, please check out the video linked below!

Thank you again!
Kelley;)


Video:


Supplies:
Tuesday, January 3, 2017

Snowman Thank You!


Hello and Happy New Year!
The cards I'm sharing today were created to give as thank you cards for Christmas gifts and goodies. I made two different card backgrounds. Both were started by stamping snowflakes from the Honey Bee Stamps "Let It Snow" stamp set. I set them all up on an acrylic block and stamped them onto watercolor paper using Versamark sticky ink. They were then covered with white embossing powder and heat set. I used the Kat Scrappiness Nested Rectangle Embossed Rope Dies to die cut both backgrounds. I love these dies. They add a wonderful stitched detail, and are so unique from others I've seen.


The card background above was made using the Clarity Stencil Brushes. These brushes are not only great to use with your craft stencils, but also to brush on color evenly. I brushed on three different colors of Distress Inks, going from dark at the bottom to light at the top. Next, I spritzed the whole background with Shimmer Spritz, let it sit for a few seconds, covered with a paper towel, and blotted up the excess. This not only adds texture by pulling up a little of the pigment, but adds an awesome shimmer over the whole piece.


The second card background above was made by smooshing the Distress Inks directly onto acetate or plastic packaging, spritzing with water and then laying or dragging the acetate onto the watercolor card stock. After I got the desired result with the acetate, I then spritzed again with the Shimmer Spritz and blotted with a paper towel.
Both of the cute snowmen were stamped with the Stampaholic Stamping Tool and Momento Tuxedo Black Ink. I colored both with Copic Markers, and fussy cut them with small sharp scissors. The first card's greeting is from Honey Bee Stamps Hello Gorgeous Words Dies. The second card's Thank You greeting is from Kat Scrappiness.
For more details, please check out the video below!
Thank you!
Kelley;)


Video:


Supplies:
Friday, December 30, 2016

Happy New Year!


Welcome everyone! I hope you all had a wonderful Christmas.
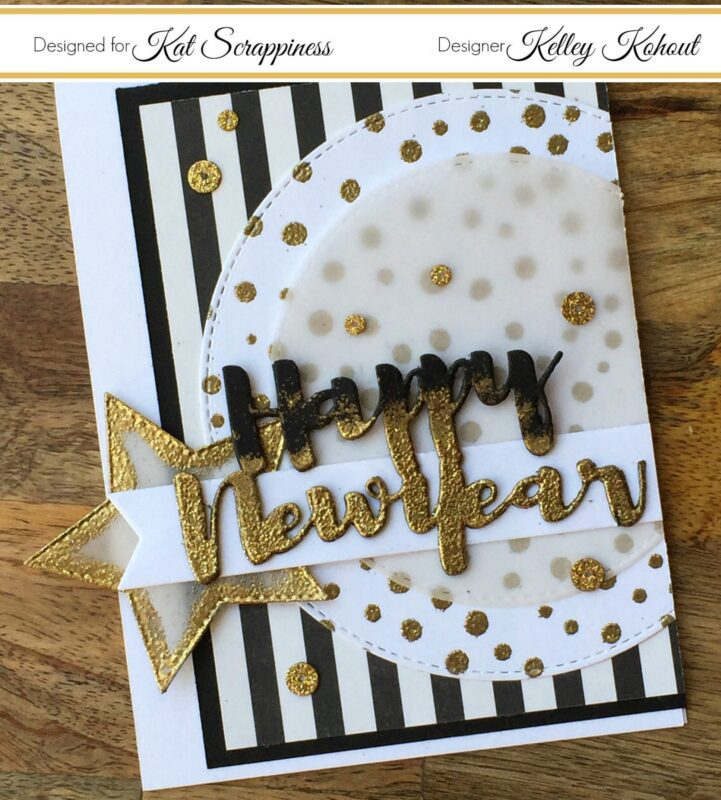
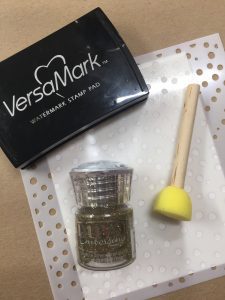
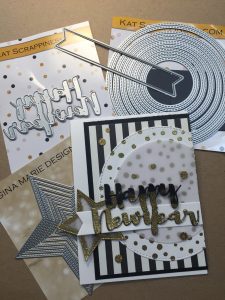
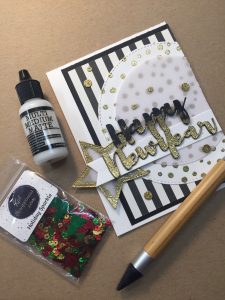
Today's project was created with the new year in mind. When I think of a New Year's Eve party, I think of lots of sparkle with black and gold. I started by stenciling the confetti dots onto smooth white card stock using Versamark sticky ink and the Echo Park Snow Fall Stencil. After taping the stencil down on top of the card stock, I squished my Versamark ink pad directly onto the stencil. I was careful to make sure to get plenty of sticky ink into the holes of the stencil.


Using the Kat Scrappiness Happy New Year die, I cut the greeting three times.They were  adhered together with spray adhesive. I used an inexpensive sponge dauber to messily sponge Versamark stick ink onto the bottom half of the Happy New Year die cuts. Next, I covered the sticky ink with Nuvo Gold Enchantment Embossing Powder and heat set it. I wanted the Happy New Year words to look like they were dripping with sparkle.


Using the Kat Scrappiness Double Stitched Circle Dies, I cut the confetti background as well as a smaller vellum circle. I love how the vellum adds dimension and interest without covering up the gold dots underneath. I also cut a vellum star using Gina Marie Design's Stitched Star Dies. Using the sponge dauber again, I inked up the edges of the star and added more of the Nuvo Gold Enchantment Embossing Powder. This is all layered on top of black and white stripped patterned paper, and plain black card stock. I shifted all of the layers to the right and trimmed off the excess on that edge.


The finishing touch to my card was to add a bit more sparkle. Can you ever have enough sparkle? I used the Kat Scrappiness Holiday Sparkle sequin mix. These sequins have the look of being glittered. The gold was perfect for this design. They perfectly matched the gold embossing powder and carried the confetti look


Thank you for joining me today! I hope you all have a wonderful and blessed new year!
Kelley;)

Supplies:


Sunday, December 25, 2016

Oh Come Let Us Adore HIM!


Merry Christmas everyone!

This little Christmas card was made using the adorable Baby Jesus Stamp and Die set from Neat and Tangled. I stamped the image twice onto Bristol card stock with Versafine Onyx Black Ink. Versafine ink is waterproof, and won't bleed when watercoloring.. I used both Distress Inks and Zig Clean Color Real Brush Markers to color the images. I first colored the hay with the Distress Inks and blended them out with water and a paint brush. On the second image I only colored the baby Jesus. I used the Zig markers to add pigment and then smoothed it out and spread the pigment with water and a brush.

Next I created the background panel. I brushed on two blue Distress Inks with an inexpensive paint brush (My Clarity Stencil Brushes are on reserve), making the center darker and lighter around the edges. To finish the background I tapped on some Shimmer Spritz and then blotted it up with paper towels. That pulls some of the pigment up in certain areas, but leaves behind added texture and shimmer.

Using my Stampaholic Stamping Tool, I lined up the greeting that came with the Baby Jesus stamp set and stamped it with the same Versafine Black Onyx Ink. I was able to stamp the sentiment twice for a darker image, by leaving it in place in the stamping tool, inking it up, and stamping it again. The bed of hay is adhered with a small piece of foam tape, with the baby adhered flat on top of that.
I love this sweet and simple card!


For more details, please check out the video below!
Thank you and Merry Christmas!
Kelley;)

Video:


Supplies:

Friday, December 16, 2016

Wishing you JOY!


Hello and Merry Christmas everyone! I hope you all are enjoying the season.
Today's project was both fun and super easy to put together! I started out by die cutting both of my background panels, the little light bulb and the pine needles. The green plaid paper and the plaid on the little bulb  is from Lawn Fawn's Perfectly Plaid Christmas 6x6 paper pad. I cut the green panel using the Gina Marie Designs Scalloped Stitched Rectangle die set. The red background was cut with the Kat Scrappiness Double Stitched Rectangle die set.

After die cutting all of the elements for the card, I used the Carta Bella Joy Stencil and Nuvo Glimmer Paste in Garnet Red to give the red background a shimmery tone on tone effect. It becomes the perfect backdrop for the green pine needles and the light bulb! When die cutting the pine needles, I cut them twice. I clipped apart the second set and adhered them on opposite sides of the first pine needle bunch to make the pine swag larger. Next, I adhered the light bulb with a small piece of foam tape to pop it up off of the red background. The string for the bulb is tucked into the pine needles and then clipped shorter.

The Joy greeting was stamped onto 40lb. vellum with Versamark sticky ink. I covered the Versamark with White Puff Embossing Powder. When you heat set this powder it puffs up and resembles snow. It's so fun to add this to winter and Christmas projects. I used Versafine Black Onyx Ink to stamp Wishing you and then coved that with clear embossing powder and heat set it. The greeting banner is tucked into the pine needles and adhered to finish this project.


For more details, please check out the video below! 
Merry Christmas!
Video:


Supplies:


Friday, December 9, 2016

Winter Coffee Lovers Blog Hop!!


Welcome Coffee Lovers!! 

I had so much fun making this coffee themed card! This adorable little critter from Newton's Nook was originally holding onto a large snowball. After I stamped him with Momento Tuxedo Black Ink and colored him with Copic markers, I fussy cut the image without the snowball. Then, I adhered the cute critter hugging onto the Love Cup Die from Penny Black. 

All of the patterned paper is from the Christmas Delivery 6x6 paper pad from Carta Bella. I used the Lawn Fawn Banner Dies and cut two different sizes of banners. The Awesome Coffee Greeting was stamped in Versamark Sticky Ink and then coated with black glitter embossing powder. 

The last thing I added was a black and white twine bow. To the tails of the bows I added the cutest little Kat Scrappiness Silver Jingle Bells. They not only add a little bit of bling to your card, but also have an actual little jingle sound. What a great way to add a little fun Christmas cheer to your cards, and they are so tiny...they would not be to bulky to mail!


Thank you all for hopping by!!

Check out Kat Scrappiness for all of the supplies, also listed below. 

Kat Scrappiness has a big sale going on NOW!
No coupon code needed. ;)


Supplies: