Email

Instagram

Facebook

Pages

Sunday, December 25, 2016

Oh Come Let Us Adore HIM!


Merry Christmas everyone!

This little Christmas card was made using the adorable Baby Jesus Stamp and Die set from Neat and Tangled. I stamped the image twice onto Bristol card stock with Versafine Onyx Black Ink. Versafine ink is waterproof, and won't bleed when watercoloring.. I used both Distress Inks and Zig Clean Color Real Brush Markers to color the images. I first colored the hay with the Distress Inks and blended them out with water and a paint brush. On the second image I only colored the baby Jesus. I used the Zig markers to add pigment and then smoothed it out and spread the pigment with water and a brush.

Next I created the background panel. I brushed on two blue Distress Inks with an inexpensive paint brush (My Clarity Stencil Brushes are on reserve), making the center darker and lighter around the edges. To finish the background I tapped on some Shimmer Spritz and then blotted it up with paper towels. That pulls some of the pigment up in certain areas, but leaves behind added texture and shimmer.

Using my Stampaholic Stamping Tool, I lined up the greeting that came with the Baby Jesus stamp set and stamped it with the same Versafine Black Onyx Ink. I was able to stamp the sentiment twice for a darker image, by leaving it in place in the stamping tool, inking it up, and stamping it again. The bed of hay is adhered with a small piece of foam tape, with the baby adhered flat on top of that.
I love this sweet and simple card!


For more details, please check out the video below!
Thank you and Merry Christmas!
Kelley;)

Video:


Supplies:


Friday, December 16, 2016

Wishing you JOY!


Hello and Merry Christmas everyone! I hope you all are enjoying the season.
Today's project was both fun and super easy to put together! I started out by die cutting both of my background panels, the little light bulb and the pine needles. The green plaid paper and the plaid on the little bulb  is from Lawn Fawn's Perfectly Plaid Christmas 6x6 paper pad. I cut the green panel using the Gina Marie Designs Scalloped Stitched Rectangle die set. The red background was cut with the Kat Scrappiness Double Stitched Rectangle die set.

After die cutting all of the elements for the card, I used the Carta Bella Joy Stencil and Nuvo Glimmer Paste in Garnet Red to give the red background a shimmery tone on tone effect. It becomes the perfect backdrop for the green pine needles and the light bulb! When die cutting the pine needles, I cut them twice. I clipped apart the second set and adhered them on opposite sides of the first pine needle bunch to make the pine swag larger. Next, I adhered the light bulb with a small piece of foam tape to pop it up off of the red background. The string for the bulb is tucked into the pine needles and then clipped shorter.

The Joy greeting was stamped onto 40lb. vellum with Versamark sticky ink. I covered the Versamark with White Puff Embossing Powder. When you heat set this powder it puffs up and resembles snow. It's so fun to add this to winter and Christmas projects. I used Versafine Black Onyx Ink to stamp Wishing you and then coved that with clear embossing powder and heat set it. The greeting banner is tucked into the pine needles and adhered to finish this project.


For more details, please check out the video below! 
Merry Christmas!
Video:


Supplies:


Friday, December 9, 2016

Winter Coffee Lovers Blog Hop!!


Welcome Coffee Lovers!! 

I had so much fun making this coffee themed card! This adorable little critter from Newton's Nook was originally holding onto a large snowball. After I stamped him with Momento Tuxedo Black Ink and colored him with Copic markers, I fussy cut the image without the snowball. Then, I adhered the cute critter hugging onto the Love Cup Die from Penny Black. 

All of the patterned paper is from the Christmas Delivery 6x6 paper pad from Carta Bella. I used the Lawn Fawn Banner Dies and cut two different sizes of banners. The Awesome Coffee Greeting was stamped in Versamark Sticky Ink and then coated with black glitter embossing powder. 

The last thing I added was a black and white twine bow. To the tails of the bows I added the cutest little Kat Scrappiness Silver Jingle Bells. They not only add a little bit of bling to your card, but also have an actual little jingle sound. What a great way to add a little fun Christmas cheer to your cards, and they are so tiny...they would not be to bulky to mail!


Thank you all for hopping by!!

Check out Kat Scrappiness for all of the supplies, also listed below. 

Kat Scrappiness has a big sale going on NOW!
No coupon code needed. ;)


Supplies:

Happy Birthday Kat!


In honor of Kat's Birthday, Kat Scrappiness is having a big sale! Now is the time to stock up on Halloween, Fall, and Christmas products. With every order....you get a FREE bag of Jingle Bells! 
No code necessary! 

Go check out the sale!
Tell Kat Happy Birthday;)


Monday, December 5, 2016

Christmas Joy To You And Yours!


Hello everyone!
I started this project with the sweet little reindeer image from Art Impressions. I stamped the image in Momento Tuxedo Black ink and colored it with my Copic markers. To build the shaker portion of the card I used both the Kat Scrappiness Double Stitched Rectangle Dies and the Gina Marie Scalloped Stitched Rectangle Dies. I filled the inside of the shaker window with Kat Scrappiness White Diamond Sequin Mix,  Christmas Red Sequins, and clear seed beads found at my local hobby store.


Please check out my process video below for more details. It's so much more fun to show you how I made this shaker card. Grab a cup of coffee or soda and join me!
Merry Christmas!
Kelley;)

Video: 


Supplies:

Thursday, November 24, 2016

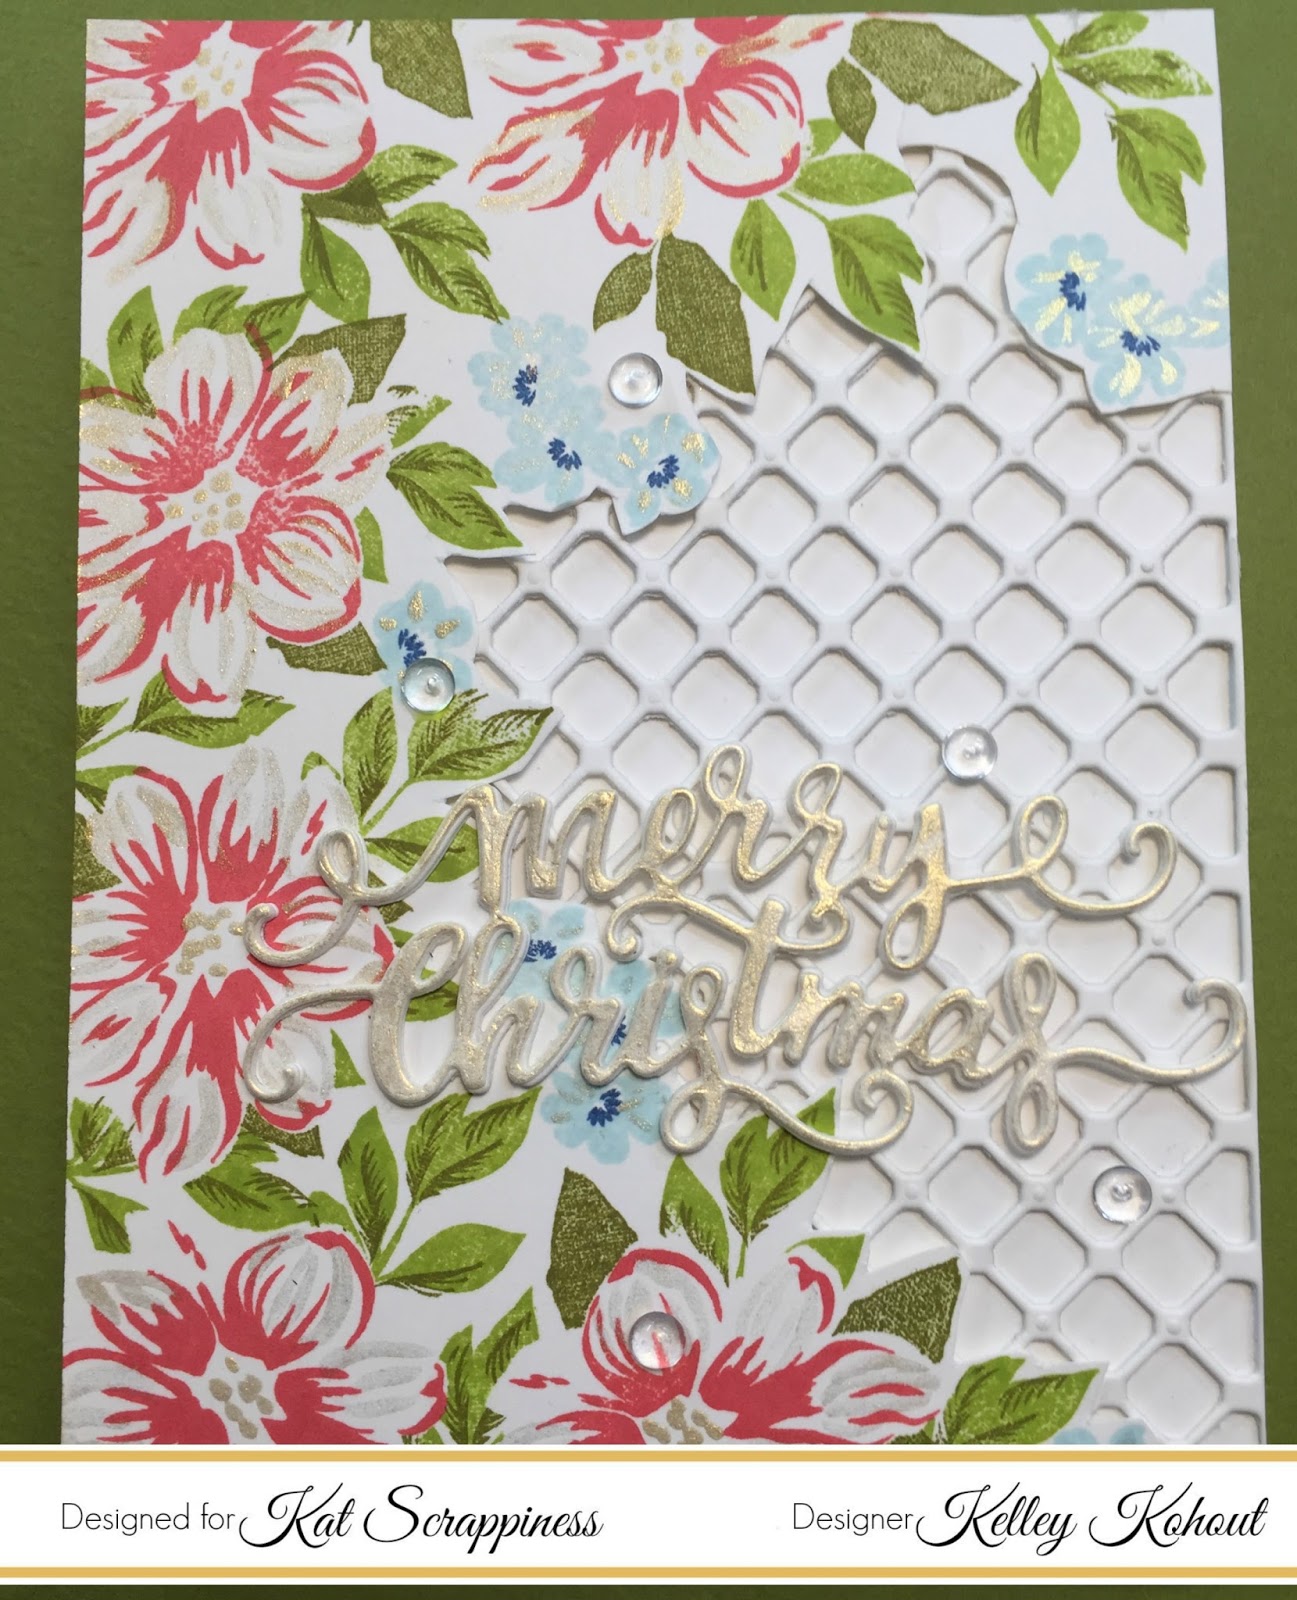
Non-Tradional Floral Christmas Card


Hello Everyone! I'm sharing a non-traditional Christmas card today on the Kat Scrappiness Blog. This project was kind of a challenge to my self, to step out of my "normal" Christmas or holiday themes. I also wanted to stretch the use of my floral stamps that I normally don't pull out until spring and summer.


These two stamp sets are from Mudra. The larger set on the left is Botanical Blooms and the smaller one on the right is Daisy Blooms. I used several images from each set to create a cluster of flowers and leaves  for my card front.


To add shimmer and details to the florals, I used the Light Gold from the beautiful Starry Colors watercolor set by Ganzai Tambi.  I also painted a piece of white card stock with the same gold and die cut the Gina Marie Merry Christmas  greeting.


The background for the floral cluster was made using the Gina Marie Lattice Background die. I used Stick It Adhesive, white craft foam, and card stock to give the background die cut some dimension.


I cut the Merry Christmas greeting three times out of white card stock and adhered them with spray adhesive. The light gold Merry Christmas was added on top of the white stack of die cuts. All of the elements were added to my card front, and then the card was finished by adding a little more sparkle. The Kat Scrappiness Sparkling Clear Droplets are the perfect finish for any project, but I especially love them on floral pieces.
Thanks stopping by!
Kelley ;)

For step by step details, please check out the video below!


Video:


Supplies:

Sunday, November 13, 2016

Deck the Halls!


Hello and Welcome everyone! With today's project, I'm so excited to start creating for Christmas. I've been holding on to and waiting months to use the super specialKat Scrappiness Stitched Christmas Tree Dies. This little tree is so versatile. I've watched and enjoyed all the fun and creative projects designed by my fellow Design Team members using this set. It has been used for everything from Halloween Trees, Fall and Autumn Trees, and even a super creative card with a mouth and teeth.

My project for today is a traditional Christmas card and decking out a Christmas tree has never been easier than with theKat Scrappiness Stitched Christmas Tree Dies.


I first cut the tree out of Kraft card stock. Using my Prismacolor pencils, I first colored the insides or inner branches with Dark Green. I tried to leave the small stitched detail around the edges. I wanted the Kraft color and details of the stitches not to be covered by the pencil. Next I took the White pencil and colored what would be the tips or ends of the branches to make them look like they are covered in snow. You can go back and forth with the two colored pencils to get the desired color and blending.  Making the tips lighter white and then blending into the green.


The background for my stitched tree was created using the Kat Scrappiness Double Stitched Rectangle Dies along with Carta Bella's Christmas Delivery 6x6 paper pad. I LOVE this paper pad. It contains everything from cute with little trucks and packages to classy with beautiful plaids and florals. I used Lawn Fawn's Big Scripty Winter Die Set for the awesome little fa-la-la greeting. I cut the word using red paper from my stash 4 times. I adhered them to each other with spray adhesive and then added them onto my tree. I finished decorating the tree with enamel dots from my stash as well as with red and white twine. I used matching red paper as the base for my stitched Christmas tree panel.


For more information and details on how I put this card together, please check out the video below. Until next time....Have a great day!


Video:


Supplies: