Email

Instagram

Facebook

Pages

Friday, July 7, 2017

say HELLO to summer!


Hi there, everyone!
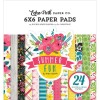
I have a bright and fun, layered project to share with you today. I was inspired by the beautiful patterned paper in the Echo Park Summer Fun 6x6 Paper Pad. Creating a layered look is the perfect opportunity to pull out lots of dies in different sizes, shapes, and edge style.


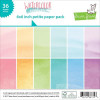
Starting with the patterned bottom layer, it was trimmed to fit my card front exactly. The black card stock was cut with the Kat Scrappiness Double Stitched Rectangle Dies. The green water color paper is from Lawn Fawn's Water Color 6x6 Paper Pad. It was cut using the Gina Marie Designs Fishtail Banner Dies. Finally, the leaf patterned paper, also from the Echo Park Summer Fun paper pad was cut using the Kat Scrappiness Fancy Scalloped Stitched Circle Dies.


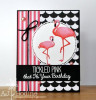
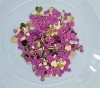
The Gina Marie Designs Flamingo Dies also paired perfectly with this patterned paper. I cut a pink flamingo from paper found in the Lawn Fawn Water Color 6x6 Paper Pad. I just happened to have the perfect matching ribbon in my stash. I love the added layer and texture the ribbon and bow gives the design. The sentiment is a sticker I had that coordinated with the colors and papers. No card is complete without add a touch of sparkle! The super sparkly pink glitter sequins are from Kat Scrappiness. I adhered them to the card using a tiny bit of Nuvo Liquid Adhesive.

Thanks for stopping by today! Head on over to the Kat Scrappiness shop! Don't forget to use the coupon code KELLEY10 to get 10% off your entire order!
Supplies:


Tuesday, July 4, 2017

Celebrate!!! Happy 4th of July!


Happy Independence Day!

Today is Independence Day in the United States! We celebrate by having family get togethers, cookouts, and lots of fireworks!

My project for today is all about fireworks! I used a  Molotow Masking Fluid Pen to create basic firework designs on water color card stock. After the masking fluid had dried, I used mini Distress Ink pads to create the night sky. I applied the ink by tapping the pads directly onto the paper. Using a Distress Sprayer, I sprayed the background to make the pigment spread. I added layer after layer of ink and water until I got the look I was going for.


I created my own gold glitter card stock by applying glitter paste onto a white piece of paper. I just thinly spread the paste with a craft knife or spatula and then dried the paste with my heat tool. The Celebrate die was cut from the center of the glitter paper. That way I could add my fireworks background over the top and no one would ever know;)


The final touch was to add a little more sparkle to the center of the fireworks. I had some gold glitter in my stash that resembles tiny gold nuggets. I simply added dots of Nuvo liquid adhesive and then applied the gold nugget glitter. You could add any type of glitter or sparkle you have in your crafty stash!

Below I have included a video on exactly how I made this card. I hope you'll stick around to check it out. While your visiting the YouTube channel...BEE sure to subscribe! Honey Bee Stamps has lots of fun surprises coming up and we don't want you to miss a thing!

Video:

https://youtu.be/gvMBold0Viw

Supplies:

Tuesday, June 27, 2017

Happy Birthday! Featuring: Honey Bee Stamps


Hello and welcome!

My name is Kelley, and I'm so honored to continue representing Honey Bee Stamps on their Design Team! Today I have a super fun and easy birthday card! I love the modern, rainbow, geometric cards I've been seeing lately.  The versatile Hexagon Solid Stacked Dies made this design simple to accomplish. There are 11 dies in this huge set. I used one of the smaller dies in the set and cut many hexagons out of Bristol card stock.


After die cutting, I pulled out my rainbow of Distress Oxide Inks: Worn Lipstick, Spiced Marmalade, Fossilized Amber, Cracked Pistachio, Broken China, and Wilted Violet. I used the Ranger Mini Ink Blenders to add ink onto each hexagon. I didn't have to be too careful in getting a perfect blend or smooth look, because I added sprays and sprinkles of water onto the hexagons. Adding water to Distress Oxide Inks makes the oxide in the formula react with water. That's what gives the hexagons the textured and spotted appearance. I adhered the hexagons to my card base....some laying flat and some raised with foam tape. I trimmed off small pieces that hung off of the card with sharp scissors.


For the greeting, I cut the Happy Buzz Word from black card stock. The Buzz Word Dies sets each have a scripty word that can be used alone, as shown here, or with the 2 coordinating shadow dies. The simple Birthday sentiment is from Paw-Some Sentiments. I love the way the simple, all caps "Birthday" looks with the elegant scripty "Happy". I treated a small strip of black card stock with an anti-static tool, stamped "Birthday" in Versamark Ink, and then added white embossing powder. I set the loose powder with a heat tool until it was good and smooth. The final touch was a few Small Clear Dew Drops!


Below I have attached a super quick video with all the details in making this card! Please stop by and check it out. As always, we appreciate your thumbs up and BEE sure you subscribe to the YouTube channel if you haven't. We have lots of amazing new designers that will be sharing their creations here on the blog, as well as , YouTube and all of our social media sites!

Video: 


Supplies:

Friday, June 23, 2017

Summer Coffee Hop!


Welcome Coffee Hop Friends!

Thanks for visiting! ;)


 I couldn't pass up using the super sweet Doodlebug Design Cream and Sugar line again for a coffee card. This time I made a folded card that holds a gift card! This folded card was super easy. Trim you paper to 4.25 X 11 inches. Holding your paper horizontally, score your paper at 2.5 inches and 5.5 inches. The first score line folded to the inside makes your gift card pocket. The second at 5.5 inches is the center fold. You can use a circle die like I did to create the little open tabbed area for your gift card, or a circle punch works as well.


I used a sweet little heart patterned paper from the Cream and Sugar 6x6 paper pad. I layered this onto craft card stock on the front cover and the gift card pocket. For the inside, I wanted it to stand out a little bit. I used the Kat Scrappiness Stitched Fancy Scallop Rectangle Dies to cut the coordinating blue card stock. I cut a simple white layer using the basic Kat Scrappiness Stitched Rectangle Dies. This made the perfect little background for my little Cream and Sugar Sprinkle Stickers to go. I added super simple shadows under the stickers with my Copic Markers. 


The front cover was made with the same coordinating card stock and a few of the Cream and Sugar Stickers. Easy Peasy! I just love this folded design with the little coffee pot and to go coffee peeking out from the other panel! 


I'm hosting a giveaway for my visitors!!

One winner will receive a $10 Starbucks Gift card, a surprise Doodlebug Designs product, and a package of Kat Scrappiness Sequins! 

Don't miss out.... Just follow me here on my blog and leave a comment! I will choose one winner on June 30th! 


Supplies:


Wednesday, June 21, 2017

Happy Birthday!!


Hello and Welcome, everyone!!

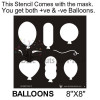
Today, I had some fun playing with the Distress Oxide Inks on black card stock. I used the super cute Die Cuts And More Balloon Stencil and Masks. This stencil has 6 different size and shaped balloons. It also included the balloon strings.

I used Picked Raspberry for the pink shade, Broken China for the blue, and Fossilized Amber for the yellow. I simply laid the balloon where I wanted it and added pigment with my Clarity Stencil Brushes onto the card stock. I overlapped a couple of the colors and it worked perfectly. You can still see the shade underneath...just like a transparent balloon! I love the texture the Distress Oxides give the card stock...It looks like linen.


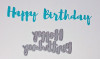
The greeting is the Kat Scrappiness scripty Happy Birthday die. I cut this 4 times out of white card stock and adhered them together, stacking them to add lots of dimension. The little shine marks on the balloons were created with a quick swipe of Wink of Stella. With a white gel pen, I made the balloon ties and strings.  I then adhered lots and lots of Kat Scrappiness Star Sequins. 

I love the way this one turned out! The Distress Oxides on dark card stock look really cool!

You still have time to win!!!


You still have time to join in the Kat Scrappiness Blog Hop!! 

You will have a chance to win a prize at each designers blog hop (One of our new stamp sets, winners choice!) and we are giving away three grand prizes right here on the Kat Scrappiness Blog!

All you need to do for your chance to win these great prizes is comment here on our blog and again at each one of our designers blog. You have until June 24th at midnight to enter. Come back June 25th 2017 at noon pst when we will announce all 10 winners!

You also have time to shop the sale!


Supplies: