Email

Instagram

Facebook

Pages

Saturday, May 27, 2017

Magic Slider Card! Featuring Lola the Giraffe!


Hi there!
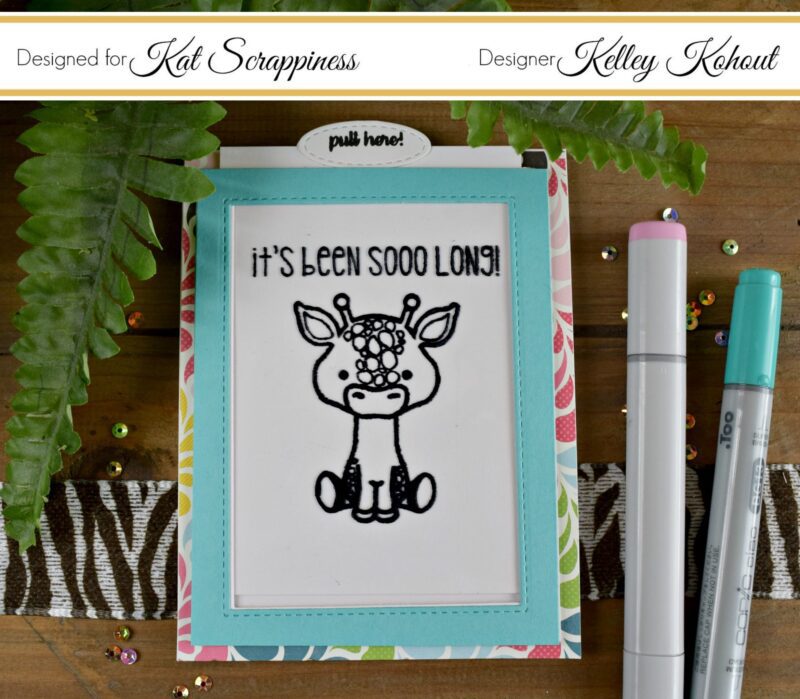
When I received the NEW! Kat Scrappiness Interactive Instructions Stamp Set along with the NEW! Kat Scrappiness Lola the Giraffe Set, the two were a match made in magic slider card heaven!

I started out by following the easy instructions I found HERE! When visiting that site be sure to look for the printable instructions;)


As I mentioned, I followed the instructions in the link and did all of my cutting and die cutting first. To cut the frames and windows I used the Kat Scrappiness Double Stitched Rectangle Dies. The pull tab for the top of the card was made using 2 of the smallest of the Kat Scrappiness Double Stitched Oval Dies. The "pull here!" Interactive Instruction was a perfect fit inside the ovals. I attached them back to back creating a tab at the top of the slider card.
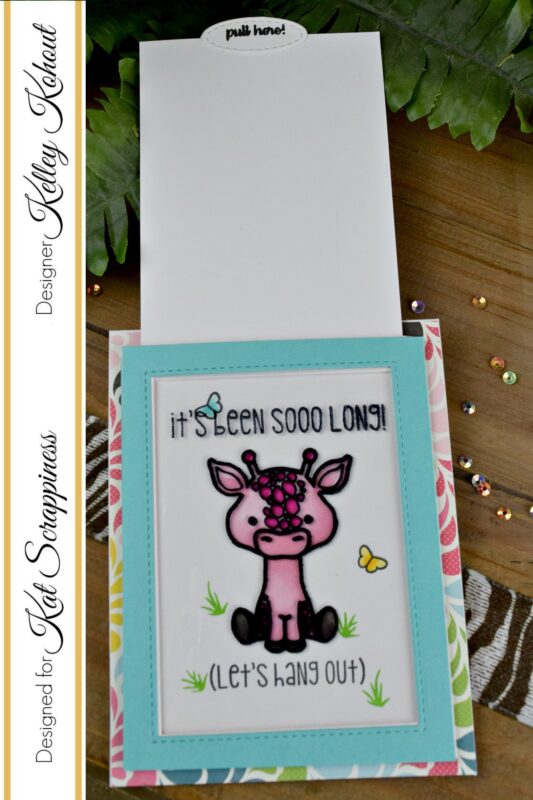


I stamped Lola and her accessories on the acetate cover in Staz On Black Ink. The image of Lola that is colored was stamped on the inside white card stock with Memento Tuxedo Black Ink. I did some super simple Copic coloring to Lola and her butterfly friends.
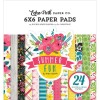
The whole slider portion was attached to a bright and fun patterned paper from the Echo Park Summer Fun 6x6 Paper Pad. All of that was then added to a white top folding card base.

This slider card was a WHOLE lot easier that I thought it was gonna be! Finding those printable instructions made this project super easy ;) Thanks for stopping by! Make sure you link your Lola Cards and Projects to the Kat Scrappiness Instagram Page. We'd love to see your Lola creations!

See ya next time! Kelley ;)

Below are 2 videos introducing both Lola the Giraffe and the Interactive Instructions Stamp Sets!


Introduction to Lola the Giraffe


Introduction to the Interactive Instructions Stamp Set


Supplies:

Tuesday, May 23, 2017

buzzing by to say HELLO!


Hello there friends!

I had a blast today playing with some Distress Oxide Inks and lots of Honey Bee Stamps!
I created rainbow stripes using my "Free Bees", the Misti, and the Misti's Creative Corners. I lined up my little bees in the Misti, and used the Creative Corners to stamp row by row. This was super easy...just count the little squares on your Misti grid and move your paper up or down to get perfect stamping! All of the bees are stamped in the Distress Oxide Inks. These yummy inks are wonderful for stamping sharp images, as well as color blending and painting techniques.


I colored some watercolor paper with Broken China Distress Oxide by taking the ink pad directly to the paper. Using a mini distress sprayer, I lightly spritzed the colored paper with water. I blotted up the excess water with a paper towel. This leaves a change in color where the water was. I love how the oxide inks actually change in color, not just bleach out so to speak when blotted up. After the paper had dried, I used the Hello Dies to create the blue shadow along with the scripty Hello in black.


The "buzzing by to say" greeting from the Bee-YOU-tiful Sentiment Set, was stamped onto white card stock with Versamark sticky ink. I dipped the little strip of paper into black embossing powder and heat set the powder. I tucked it in behind the H in Hello and adhered it all to the card front with liquid glue. Last but not least, I had to add a couple of Busy Bees buzzing by. I stamped these little guys in Memento Tuxedo Ink and colored them with copic markers. Using the coordinating Busy Bee Dies, I ran them through my die machine to cut them out. They were adhered around the greeting using small bits of foam tape to pop them up off of the card.

Thanks for buzzing by today! Have a great week;)

Supplies:


Tuesday, May 16, 2017

Be Unique! Featuring: Honey Bee Stamps


Hello again friends! I hope you all are having a blessed week!

I have to tell ya.... this card was so fun to make! I have seen layered backgrounds like this in the past. Some stamped underneath. Some color blended. There are tons of techniques you could use to make a background like this. I chose to use the sweet little daisy blooms from the Busy Bees Stamp Set. First, I die cut the upper layer with the coordinating Busy Bees Honey Cuts Dies. I put a piece of Neenah Solar White Card Stock into my Mini Misti and then laid the die cut layer on top of it. I fit the daisy stamps into the open die cuts like little puzzle pieces to insure I stamped them where they belong. Closing the lid of the Misti I picked up the stamps.  I removed the die cut layer, inked the daisy blooms up with Memento Tuxedo Black Ink and then closed the Misti lid to stamp. I followed this process over and over until all of the die cut flowers had stamped images underneath them.


I found inspiration images on Pinterest for coloring both the white daisies as well as the bright and colorful one. Using Copic Markers, I very simply colored all of the images. The "Be" die cut was made using the scripty "Bee" word in the Bee-You-Tiful Honey Cuts Dies Set. I simply trimmed off the extra "e" to form the word I needed. The word "unique" comes from the Bee-You-Tiful Sentiment Stamp Set. It was stamped in Versamark sticky ink, covered in black embossing powder, and finally heat set. I added a little glitter to the colorful flower and the die cut "Be" using a Wink of Stella clear glitter pen.

Below I have included a video of the whole process of making this fun card! Thanks for checking it out. While your there BEE sure to subscribe!

Video:


Supplies:

Sunday, May 14, 2017

Mother-Daughter Craft Day!


Happy Mother's Day to all of the loving Moms, Grandmas, Sisters, Aunts, Mothers-In Law and anyone else taking on the awesome task of helping to raise children. In celebration of this special day, my daughter Emily and I had a Mother/Daughter craft day and we thought we'd share our fun!

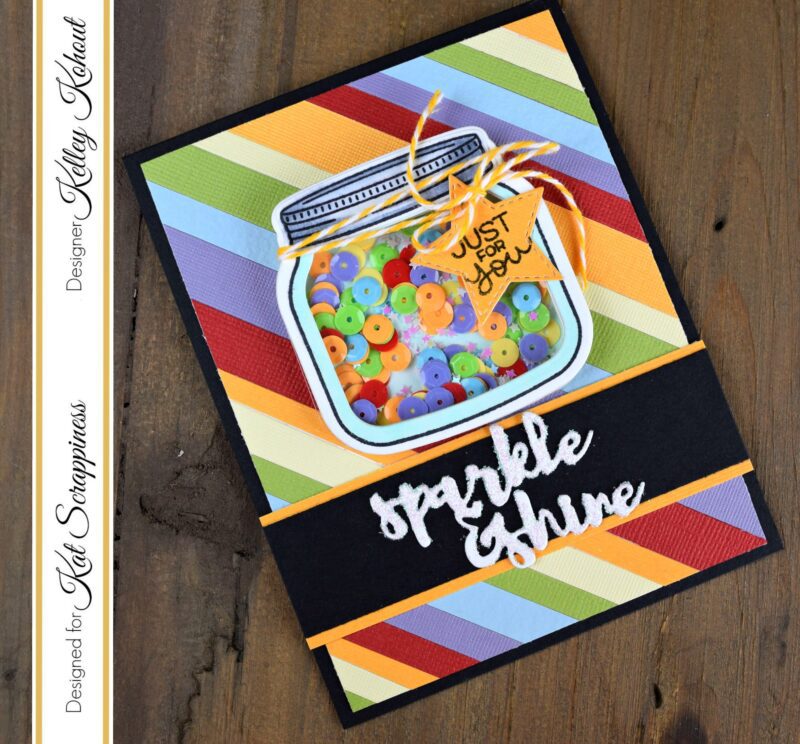
The inspiration for our cards was the recent post and video by Jennifer McGuire using scraps of paper to create a fun background. This was the perfect technique to try with kids. Cutting the strips of paper was much faster and easier than I imagined. We took our color cues from two of the Kat Scrappiness Sequin Mixes. I picked out the rainbow of paper to coordinate with the Rainbow Splash Sequin Mix. Emily's background was chosen to match the Ocean Sequin Mix.


We decided to make our shakers using the super cute How You Bean? Stamp Set and Shaker Jar Add-On Die Set both from Lawn Fawn. Emily used copic markers to color the cute little octopus from Lawn Fawn's Octopi My Heart Stamp Set. She added the image to the front of her jar so it wouldn't be covered up by all of her shaker goodies. The "Happy Birthday" greeting is also from the How You Bean? Stamp Set. Emily stamped it in Versamark ink, added white embossing powder, and then heat set it.


The greeting for my card is the Kat Scrappiness "Sparkle & Shine" Die. I thought this was the perfect fit with my little shaker jar full of lots of rainbow sparkle. I added a little liquid glue to the die cut and dipped it into Nuvo Pure Sheen Glitter. This gave my die cut the perfect "sparkle & shine". Using the Gina Marie Stitched Stars Dies, I cut a small coordinating star and tied it onto the jar with matching twine. The little " Just For You" stamp is from Lawn Fawn's Tiny Tags Sayings Stamp Set

Emily and I made a little process video together. I hope you enjoy it!
Happy Mother's Day ;)
Kelley & Emily

Video:


Supplies:

Tuesday, May 9, 2017

Honey Bee Stamps NEW Washi Tape!


Hello Honey Bee Friends!

Today I want to show you all of the beautiful Washi Tapes that Honey Bee Stamps just released! I'm sure most of you saw the quick sneak peek that Jennifer McGuire gave us last week. Here is a video introduction to all 4 gorgeous Washi Tapes!

Video Intro to the NEW Washi Tapes


My card project today contains 3 of the beautiful new washi tapes. I first stenciled the Hex Design (be looking for this stencil and others in the shop soon;)) using Clarity Stencil Brushes and Squeezed Lemonade Distress Ink. I just wanted a splash of color for texture and interest in the center of the background. Next, I layered the washi tape starting with the Zen Floral Exclusive Washi Tape. I added the Black with Gold Hexagon Foil Washi in the center to break up the black and white designs of the other two, as well as coordinate with the stenciled pattern in the background. Lastly, I added the Zen Bouquet Exclusive Washi Tape.

I love that the Zen Floral and Zen Bouquet Washis coordinate with the stamp sets of the same names. What a cool way to tie in the card to it's envelope, Bible journaling designs, and more! I used the coordinating stamp sets to create the matching bouquet of flowers for my card. The greeting was added using the Simple Sentiments Stamp Set. It's font was the perfect simple addition, so not to take away from the rest of the design.

Please check out the card process video below! While you're visiting BEE sure you subscribe!

Washi Thank You Card Video


Supplies: