Email

Instagram

Facebook

Pages

Friday, March 31, 2017

Honey Bee Stamps + MISTI Collaboration Blog Hop!!


Hello everyone and WELCOME!! 

This blog hop is made up of designers from both Honey Bee Stamps and My Sweet Petunia design teams, and includes lots of crafty inspiration, prizes and more! If you have been hopping along, I know you must be enjoying all of the projects. If you're just joining the hop, the order of designers is listed at the bottom of the post. 

The idea of this collaboration hop was to use both Honey Bee Stamps and the Most Incredible Stamping Tool Invented....the MISTI together on a project. That is definitely not difficult to do! Don't we all use our MISTI's on every project? ;) 


I used the Honey Bee Stamps Thanks & Giving Stamp Set along with my Mini MISTI to create a banner of greetings. I love how Honey Bee includes so many greetings, sentiments, and phrases in their sentiment stamp sets. I love using lots and lots of the greetings on my project by lining them up in the MISTI and stamping them multiple times. It's a quick and easy way to make almost a text patterned paper for your projects. 


Here is a close up of the details of this card. I have included a video below, which includes all of the stamping with the Mini MISTI, the metallic embossed die cuts from the Thanks & Giving Honey Cuts Dies, and the ink blended background. To finish off this card, I used several Clear Dew Drops from Honey Bee Stamps. I love the sparkle, dimension, and interest these add to a project. They add just a little something, without taking way from the design. 


Thank you all for hopping over! Don't forget to check out the video below and SUBSCRIBE to the Honey Bee Stamps You Tube Channel. There are many fun new products, and things to celebrate coming up very soon for Honey Bee Stamps... and we don't want you miss a thing!

VIDEO:


Make sure you comment on each stop of the Blog Hop to be eligible for the prizes!

There will be 2 (two) winners of the hop. One will win a $45.00 Gift Certificate from Honey Bee Stamps and the other will win their choice of a Regular or Mini MISTI. 


Winners of the MISTI and the Honey Bee Stamps Gift Certificate will be announced (HERE!)

Keep Hopping! 

Your next stop is Cassie Tezak! 

Complete Blog Hop List!!

Tuesday, March 28, 2017

Honey Jar Shaker Card!


Hello friends! Thank you all for joining me today for this super simple Honey Jar Shaker Card. The inspiration for this card was the rich and beautiful color of the Bee Pollen Dew Drops. I knew they would be the perfect shaker filler in my jar of honey.

I started out by stenciling the background paper first. I used a honeycomb stencil and 2 Distress Ink Colors in Mustard Seed and Fossilized Amber. This piece was cut down to 4 x 5.25 inches in order to allow the A2 size (4.25 x 5.5 inch) top folding card base to peek out around the sides.


The "Sweet As Honey" greeting is from the Sweet As Honey Stamp Set. I prepped a scrap of vellum with an anti-static powder tool and then stamped with Versamark Ink. The sticky Versamark Ink was covered with Platinum embossing powder and then heat set. I love using platinum embossing powder. It goes very well with both warm and cool colors. I fussy cut the scripty "honey"  embossed word and added it to the vellum greeting label.
All of the dies for the sweet little canning jar are found in the Honey Jar Fold Along Card Die set. I made 3 cuts of the jar image: 2 of the teal blue and 1 acetate. To add the window to one of the blue die cuts, I used a label die that fit perfectly! The Honey Jar Fold Along Card Die set also includes the cute little matching lid for your jar. The image above is the whole Honey Jar Fold Along Card. I used the inside jar portion (seen here in white) for my shaker jar. This die set offers many cute possibilities!


Putting together the shaker part of this card was super easy! Please check out the video that I've added below for the step by step process in making the shaker jar and card.

Video:

Supplies:


Friday, March 24, 2017

Spring Coffee Lover's Blog Hop!


Welcome Coffee Lovers!!
I'm so excited to be joining in the fun of another Coffee Lover's Blog Hop!
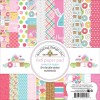
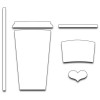
I took my inspiration for this card from the super cute and popular Cream & Sugar 6x6 paper pad from Doodlebug. I've been hoarding this precious paper for months waiting for the perfect opportunity to use it. I paired it with the Love Cup dies from Penny Black. This set of dies includes everything you need to make both a hot and iced cup of coffee!


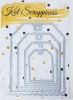
I started out by cutting the patterned paper with the Kat Scrappiness Fancy Stitched Scallop Rectangle Dies. Using the largest and next largest dies, I created layers on top of my card base. I used the same color as the card base and created another layer and grounding spot for my Love Cup to sit. This layer is a tag from the Kat Scrappiness Stitched Scallop Nesting Tags. I added some color and interest with some pink crinkled seam binding and a pink heart button. 


I love the scallop and stitched detail on this tag die set!
The cup and heart were adhered with a little foam tape adhesive. For the greeting, I used the Kat Scrappiness Brush Script Hello Die. I'm in love with the size and font of this die. I added dimension to the hello by cutting some light colored chip board and adding it underneath the patterned paper. I love the interest this adds and saved me from having to stack up several die cuts of the hello greeting! The last things I did to add finishing touches, was to add White Gel Pen around the edges and Glossy Accents to the sweet heart. 


Thanks for Hopping over to my blog!!! 

Be sure to check out the HUGE SALE at Kat Scrappiness! Sale runs until the end of the Blog Hop!


15% OFF Your Entire Order!!! 

COUPON CODE:
SPRINGCOFFEE


Supplies:


Tuesday, March 14, 2017

Fun Gender Reveal Featuring: Honey Bee Stamps Celebration Box & Hooray!


Hello everyone!
Kelley here again with another fun use for the awesome Celebration Box Stamps and Dies! When I received this set along with the Hooray! Stamp Set, I instantly thought of the cute gender reveal party videos I've seen all over the internet! This could be used as invitations or just a sweet way to let friends and family know your exciting news!


I started out by doing lots of die cutting. I cut lots of pink and blue balloons, one white balloon, and a celebration box all from the Celebration Box Honey Cuts Dies. Then using the Hooray Day Honey Cuts Dies, I cut the black celebrate shadow and several of the word celebrate to stack up in order to add a little dimension.


When I did the stamping, I had to make a small mask for the scratch off balloon. It was super easy...Watch the step by step process in the video below!


Make sure you subscribe to the Honey Bee Blog and YouTube channel! We have many new and exciting things coming very SOON! You don't want to miss a thing!


Video:


Supplies:


Sunday, March 5, 2017

Welcome Spring with Lots of Honey Bee Stamps


The whole team at Honey Bee Stamps is coming together to celebrate the much beloved 30 Day Coloring Challenge hosted by Kathy Racoosin and her blog The Daily Marker!

Melissa started us off by sharing an amazing floral card in her blog post HERE! Be sure to check back here on the Honey Bee Stamps Blog as each team member will be sharing different coloring styles, mediums, and a few tips and tricks along the way.


I'm so excited to be sharing my project for today which includes lots of coloring in celebration of The Daily Marker 30 Day Coloring Challenge hosted by Kathy Racoosin! Since I'm currently dreaming of springtime, I've included lots and lots of florals from the Zen Floral Stamp Set, as well as the sweet bunny from the Spring Honey Buddies set.


The Bunny Buddy is a perfect fit in the newly released Celebration Box. His little paws are cut when you use the coordinating dies, so you are able to lift them so they can peek out of the box.


All of the images were stamped onto Bristol card stock using my MISTI stamping tool and Versafine black ink. This type of ink is waterproof and perfect for using with Zig Clean Color Real Brush Markers. After stamping, I always make sure the ink is dry before starting to color. When all the images were colored, I die cut them using the coordinating Zen Floral Dies. I arranged the florals all over the card tucking them in here and there surrounding the box and bunny. The greeting was stamped using two Honey Bee stamp sets. The "welcome" stamp comes from the newly released Welcome Baby Stamp Set, and I spelled out the word SPRING with the help of the Hand Lettered Alpha Stamps.

The making of this card as well as a quick demo using the Celebration Box Dies and Stamp Set can be found in the video below. Please check it out and don't forget to stop back by tomorrow when another member of the Honey Bee Stamps team will be taking on the 30 Day Coloring Challenge!

***Sakura Black Glaze Pen:
https://www.amazon.com/Sakura-38495-2-Piece-3-Dimensional-Glossy/dp/B00161PXXQ/ref=sr_1_1?ie=UTF8&qid=1488581298&sr=8-1&keywords=sakura+black+glaze+pen

Video:


Supplies:


Tuesday, February 28, 2017

Color Burst Background Featuring Honey Bee Stamps "SMILE"


Hello there friends! I don't know what the weather is like in your neck of the woods, but it's snowing as I type this at my house. I needed a little color, sunshine, and glimpse of spring time, so I pulled out many inks and began creating bursts of color!


I knew that the Honey Bee Stamps "SMILE" Stamp Set would be perfect for this background. This small, yet mighty stamp set contains everything you need to pass love and smiles onto to someone that could use them.

 Using the Honey Cuts "SMILE" Die, I cut 4 of the smiles and adhered them together, before inking them with matching ink.  I dotted the "i" using a Clear Honey Bee Dew Drop.


On this version, I used super bright dye inks! I love that this technique can work for any occasion. You can use pastels for baby cards, manly colors for the men in your life, and on and on...the possibilities are endless!


I decorated this background by simply adding an inlaid "smile" and dotting the "i" with a Honey Bee Diamond. I have added a quick video below if you'd like more details on how I put these cards together.

Video:


Monday, February 20, 2017

Craft Room Tour


Hello Friends! I put together a quick craft room tour today. My husband built built both the craft table and paper organizer doing his own "Ikea Hacks" to some Ikea Kellax shelving units. Please comment or email if you have questions on any of the supplies or materials used. 

Thanks for watching;)

Video: